How to Set Up Windows 11 Wi-Fi EAP Settings
The Settings app is the easiest way to create a Wi-Fi EAP profile
4 min. read
Published on
Read our disclosure page to find out how can you help Windows Report sustain the editorial team Read more
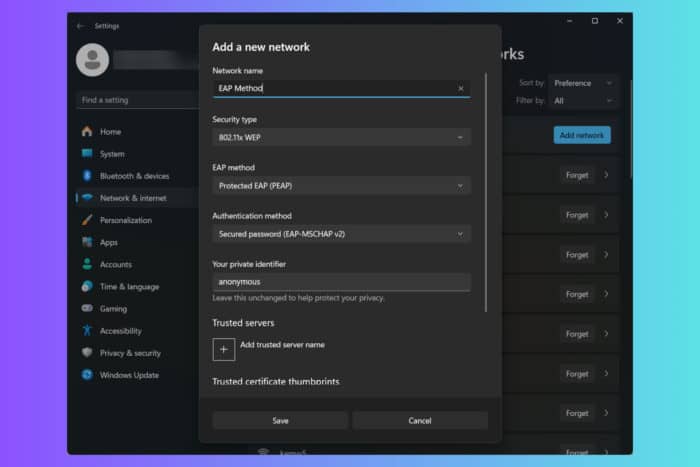
As its name suggests, the Extensible Authentication Protocol (EAP) is used for managing authentication settings and profiles. Here is how configure Windows 11 Wi-Fi EAP settings, especially if you don’t have access to MDM or Group Policy.
How do I configure Windows 11 Wi-Fi EAP settings?
1. Using the Settings app
- Press Win + I to open Settings.
- Go to Network & internet and select Wi-Fi.
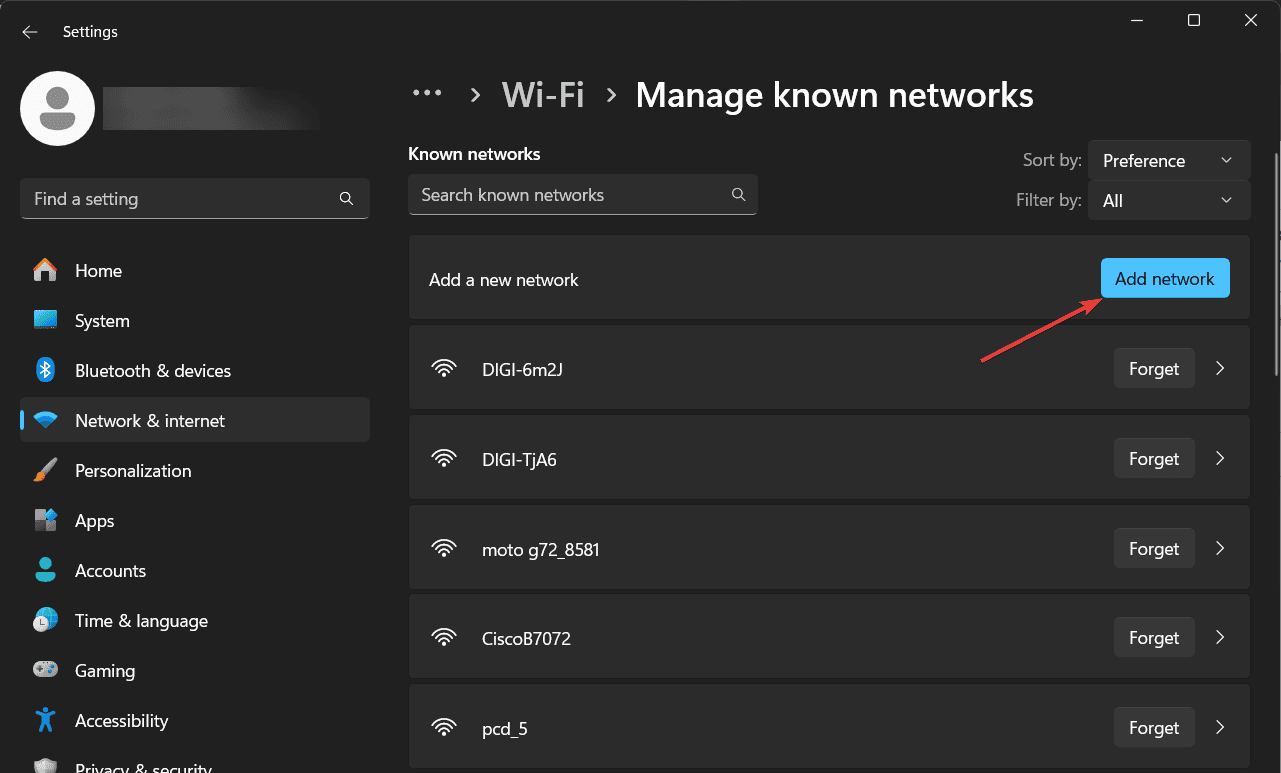
- Now, select Manage known networks and click the Add network button.
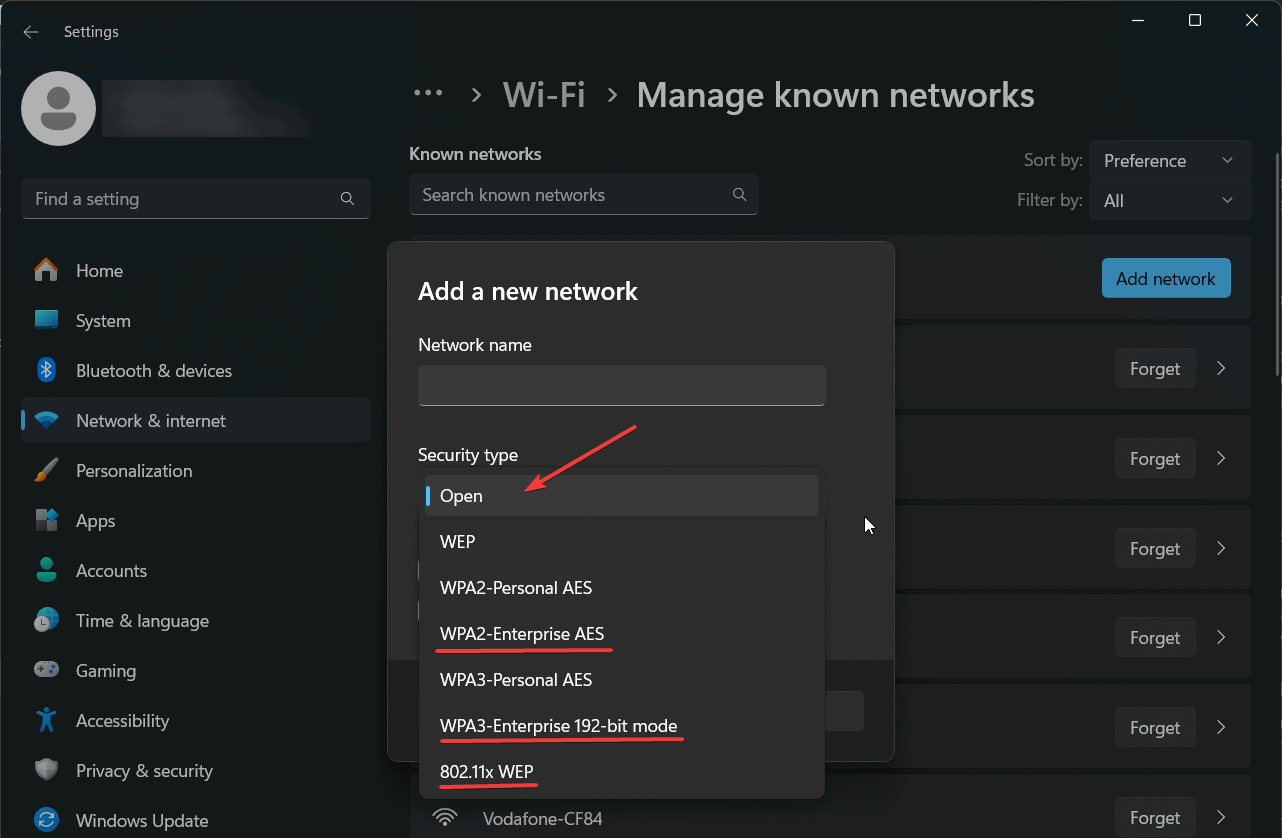
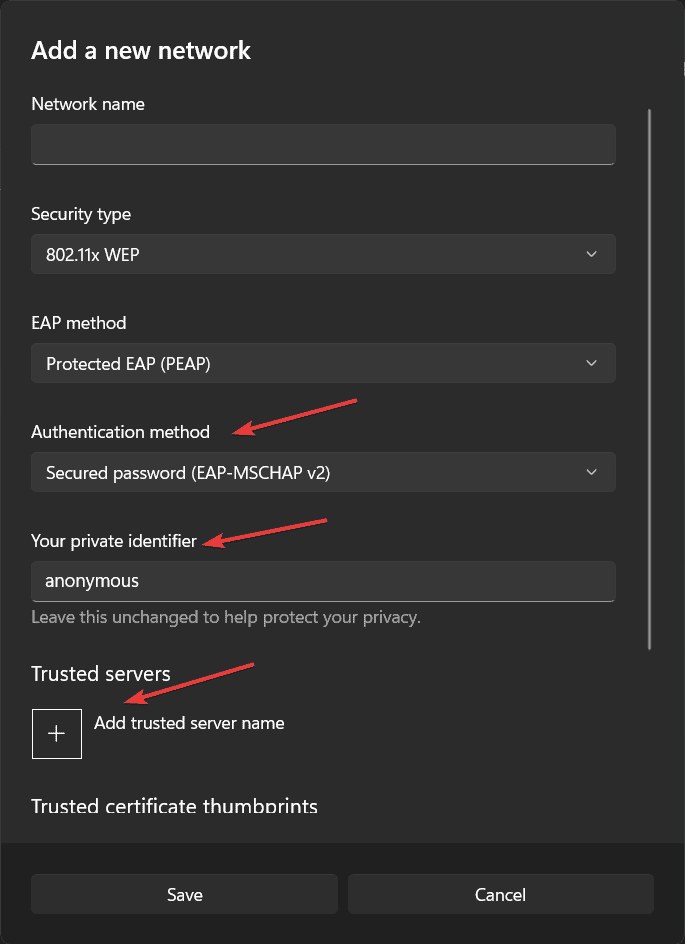
- After you type a SSID (name of the connection), you can change the security type and if you select an Enterprise option or 802.11X WEP, you will be able to configure the EAP settings.
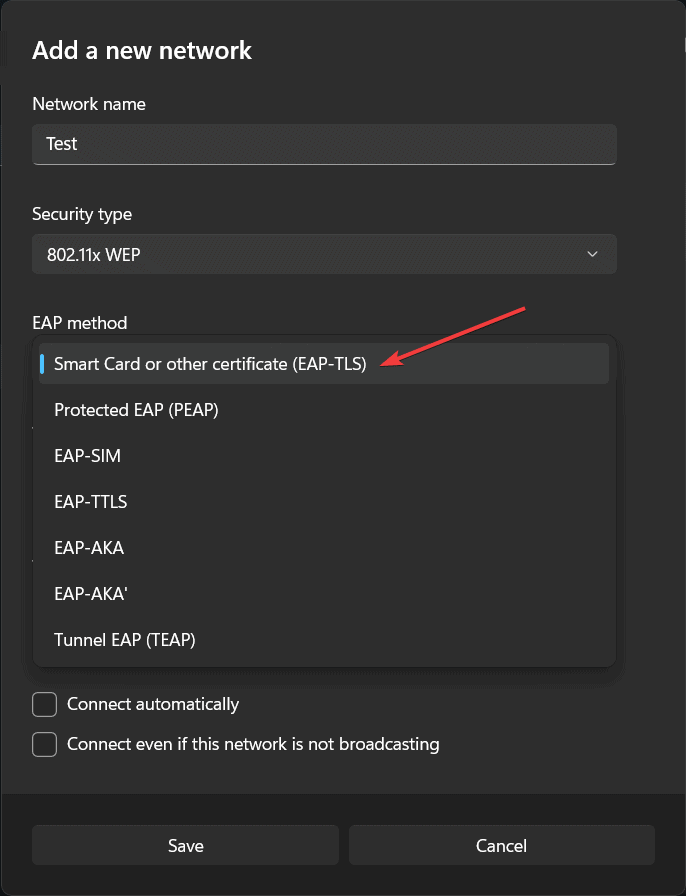
- Now you can select the EAP type from the drop down menu according to your needs.
- For each EAP type, you will be able to select the authentication method, a private identifier and a trusted server.
- Review the data and click the Save button once you’re done.
Go through the settings carefully because once you click the Save button below, you won’t be able to edit the profile from Settings. You will have to delete this profile and start over with the needed modifications.
2. Set up Wi-Fi EAP using Command Prompt
To configure a Wi-Fi network in Windows 11, you can use the netsh command in Command Prompt or PowerShell.
The netsh syntax is: netsh [-a AliasFile] [-c Context] [-r RemoteMachine] [-u [DomainName]UserName] [-p Password | *]
[Command | -f ScriptFile]
Here are a few examples on how you can use netsh:
- To display all Wi-Fi profiles:
netsh wlan show profiles - To show details of a certain profile:
netsh wlan show profiles name="ProfileName" - Exporting a Wi-Fi profile to a folder:
netsh wlan export profile name="ProfileName" folder="C:\Nameofthefolder" - Adding a profile from an XML file:
netsh wlan add profile filename="C:\Profiles\ProfileName.xml" - Deleting a profile:
netsh wlan delete profile name="ProfileName"
As you can see, you may also use an XML file containing the configuration options for that connection and import it using netsh.
3. Using the Group Policy Management Console
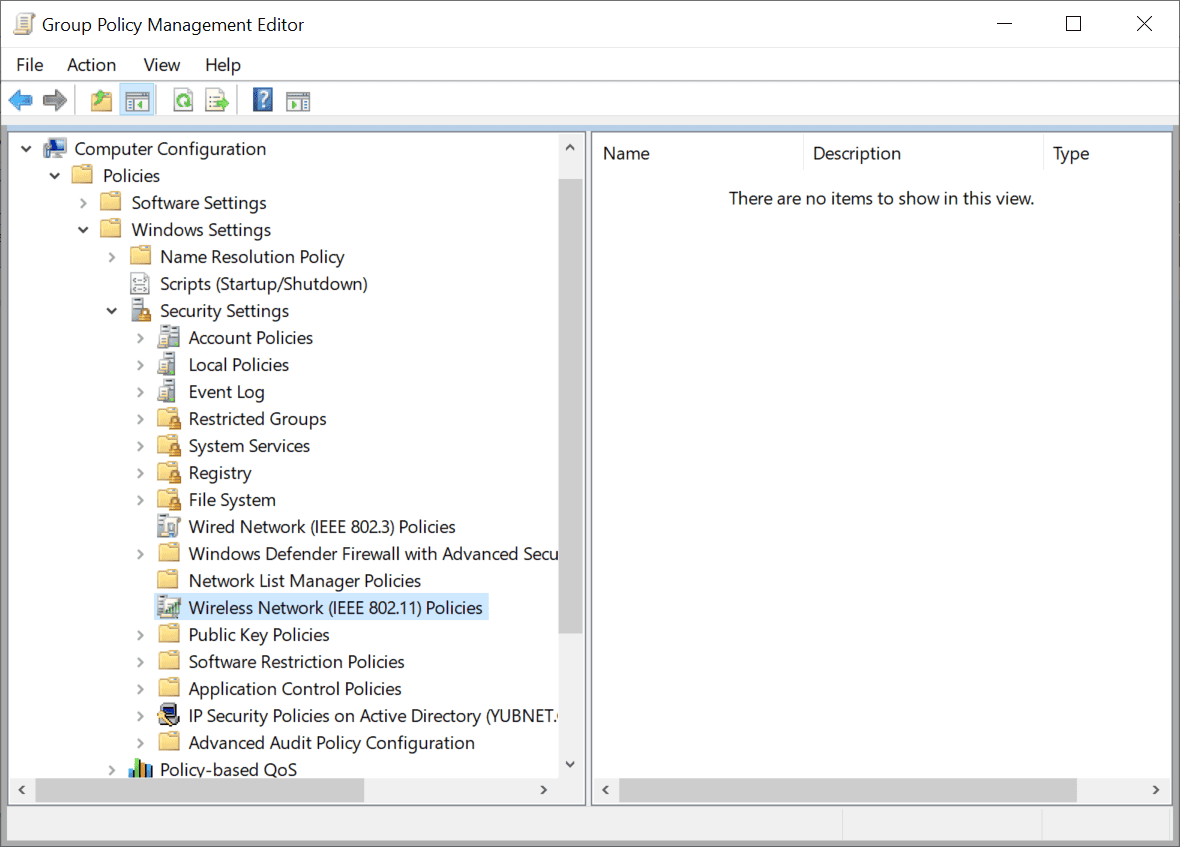
- Open Group Policy Management Editor and go to: Computer Configuration > Policies > Windows Settings > Security Settings > Wireless Network (IEEE 802.11) Policies
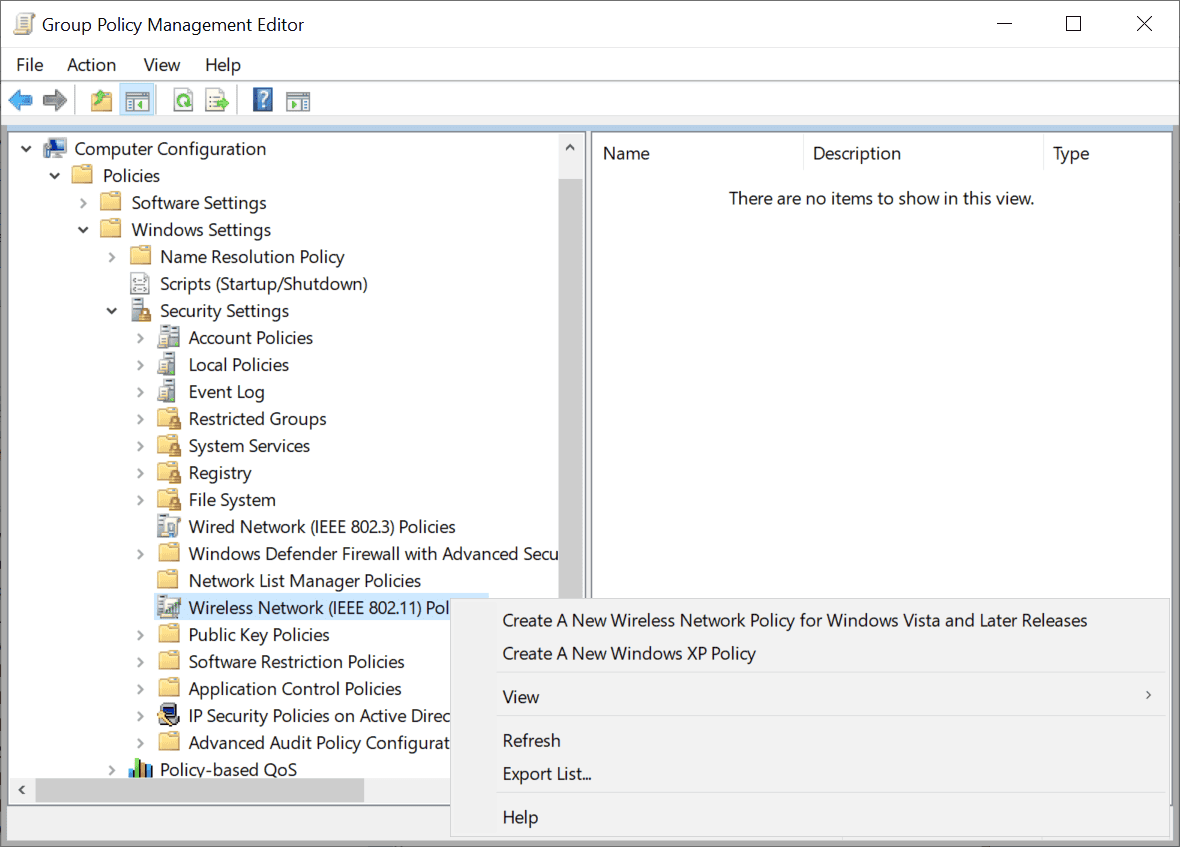
- Right-clicking on Wireless Network (IEEE 802.11) Policies and choose Create A New Wireless Network Policy for Windows Vista and Later Releases.
- Click on Add and select Infrastructure to create a new Wi-Fi policy.
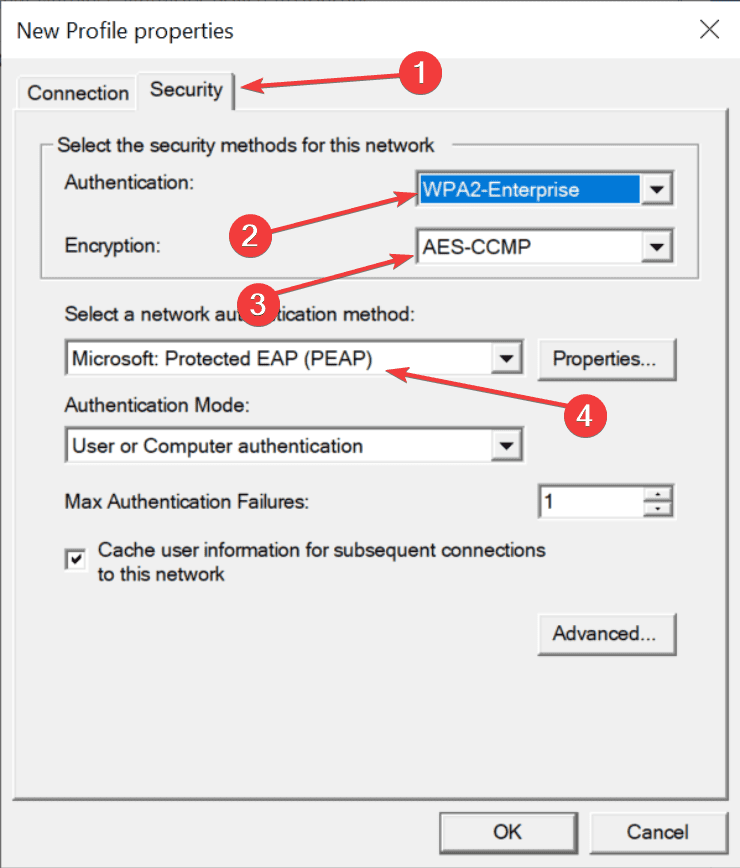
- Here, click on the Security tab and select an Enterprise authentication type to access the EAP authentication method.
- Review your settings and click OK, then save the profile.
What are the most popular EAP methods?
We will list here the most used enterprise authentication methods:
- EAP-TLS: Smart Card or other certificate – The users will be able to use a smartcard for login or another type or certificate issued by Microsoft or other entity.
- Protected EAP (PEAP): This EAP can use two types of authentication – Secure password (EAP-MSCHAP v2), which will simply use the Microsoft account and the Smart card or other certificate (EAP-TLS), which we listed above.
- EAP-SIM: As the name suggests, this type of authentication uses a SIM card for login. It is less used but ensures a high level of encryption.
- EAP-TTLS: This type can include EAP-TLS and PEAP, and includes the Enable identity privacy feature. This specifies that clients are configured so that they can’t send their identity before the client has authenticated the RADIUS server, and optionally, provides a place to type an anonymous identity value.
We conclude our guide here hoping that we offered sufficient information to configure Windows 11 Wi-Fi EAP settings and set up your enterprise authentication profiles. If you can’t deal with command lines, you may also use a network configuration manager tool such as Manage Engine NCM that will help you configure every aspect of your network, including the Wi-Fi EAP using a dedicated console with a comprehensive interface.
We also recommend checking our list of the best open source software for enterprise security.
Let us know in the comments if you have any questions or suggestions.




User forum
0 messages