Microsoft Outlook Contacting the Server for Information [Fixed]
8 min. read
Published on
Read our disclosure page to find out how can you help Windows Report sustain the editorial team Read more
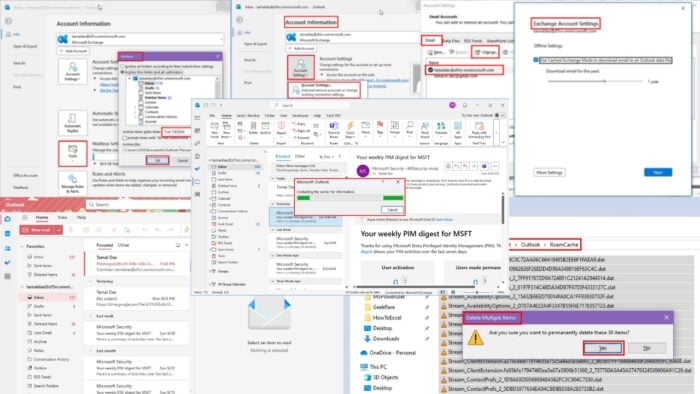
Have you encountered a Microsoft Outlook error saying “Contacting the server for information?” Read on to fix this annoying error right now.
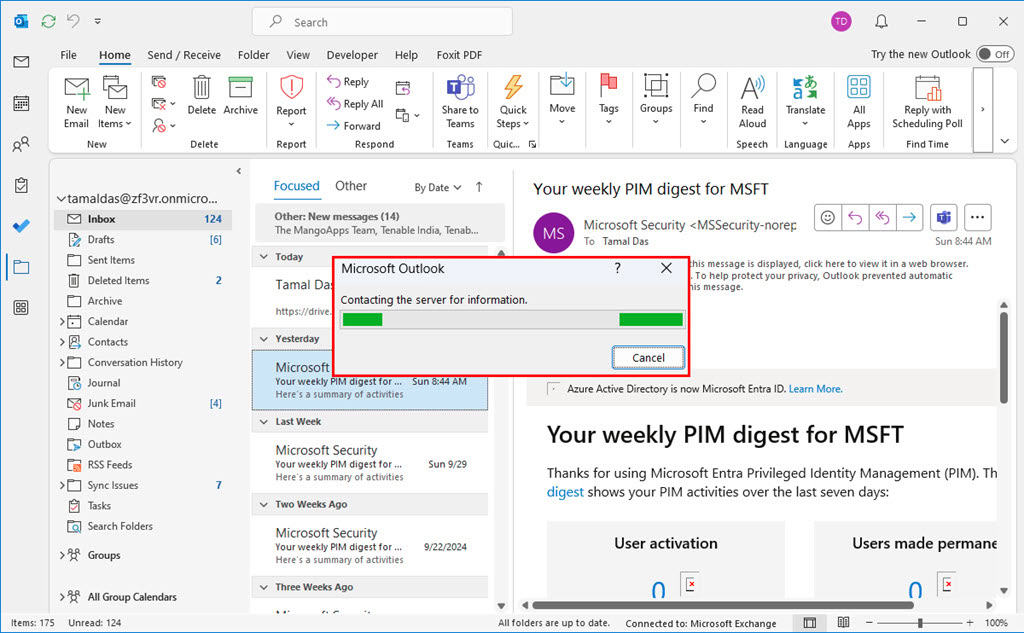
The Outlook desktop app intermittently shows a message when you open email attachments, media, or update the mailbox. It’s trying to check with the server for further data to grant you access to the content you need.
This message is normal once in a while. However, if you repeatedly face the same warning, there are some DIY troubleshooting approaches you can follow for a quick resolution.
Why Is Microsoft Outlook Contacting the Server for Information?
Here are the most common causes of this error:
- You’re using an on-premise mail server that isn’t functioning for Outlook mailboxes.
- Microsoft 365 is trying to contact a remote server, like Google Drive for email attachments.
- Outlook is trying to download images from an HTML email.
- The internet network has a low bandwidth or it’s not working.
- Outlook is unable to access the local cache.
- The PST file is corrupted.
How To Fix Microsoft Outlook Contacting the Server for Information
Now, let me show you the simple methods you can follow to fix this annoying error message for good:
Basic Checks
Try the following quick fixes before moving ahead with more time-consuming ones:
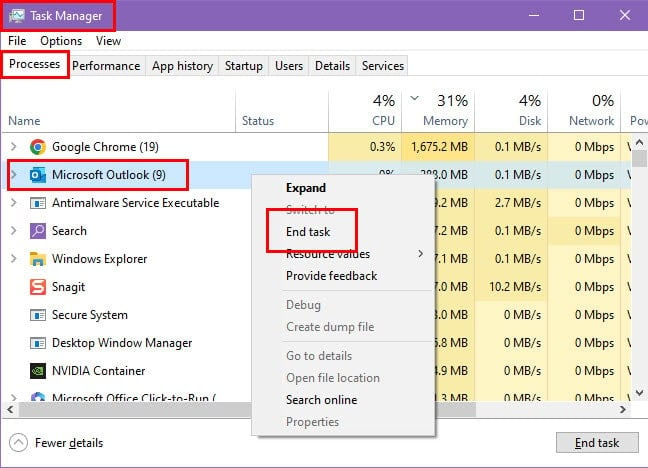
- End the Outlook process: Press Ctrl + Shift + Esc to open Task Manager. Under the processes column, find Outlook, right-click, and choose End task from the context menu.
- Restart PC: Reboot the PC to fix glitches in memory, software, background processes, network, etc.
- Restart router: Switch off and on the router to fix any internet connectivity issues.
- Free up bandwidth: If you’re currently downloading or streaming content, stop those tasks. This will allow the Outlook app to use more bandwidth to fetch content from the remote server.
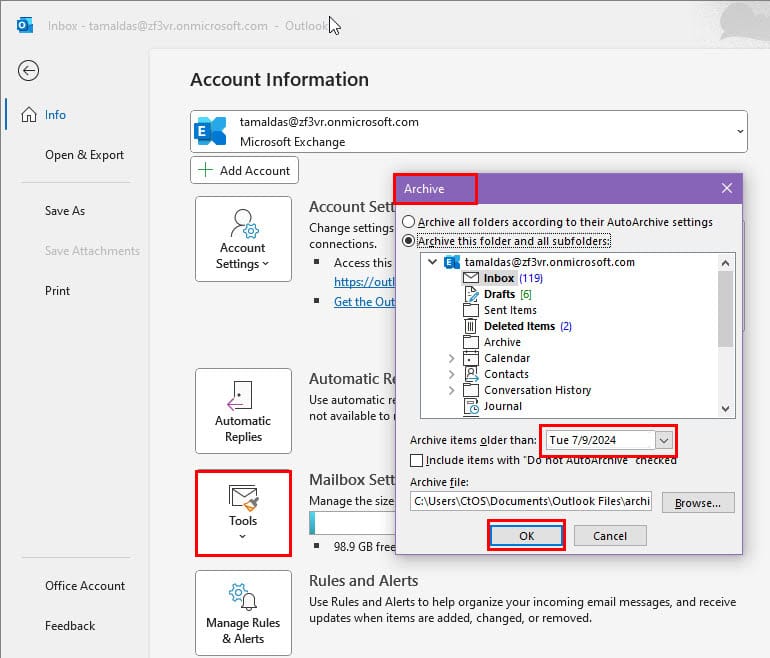
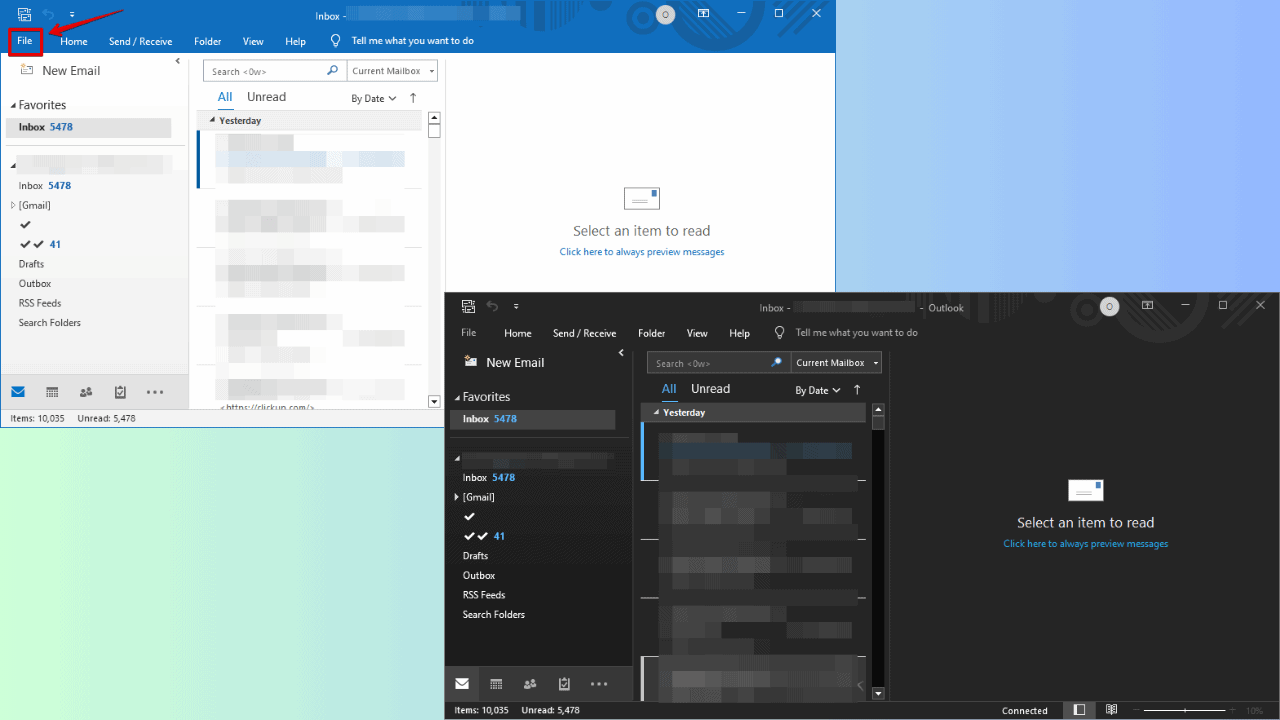
- Reduce mailbox size: Go to the Tools menu from the File tab and select the Clean Up Old Items option. Select a cut-off date prior to which you’d like to archive all emails. Click OK. Use the file location given in the Archive file field to access archived emails in the future.
Use Outlook for the Web App
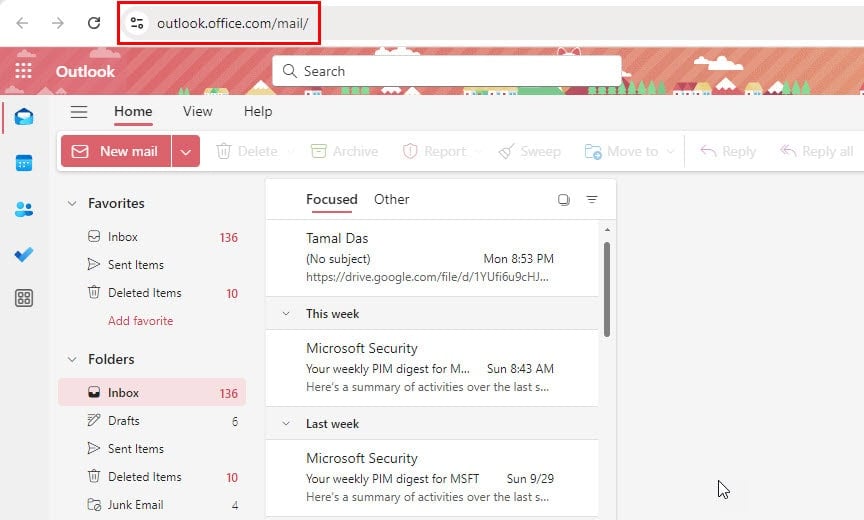
When you need to access an email and its attachments right now but the ‘Microsoft Outlook: Contacting the server for information’ error is stopping you, do the following:
- Visit the Outlook web app.
- Log in with the same email credentials as for the desktop version.
Clear the Outlook Cache
- Close the desktop app.
- End its process from the Task Manager.
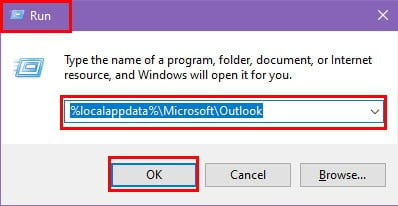
- Press the Windows + R keys together to launch the Run dialog.
- Enter the following command in the Open box:
%localappdata%\Microsoft\Outlook- Hit Enter.
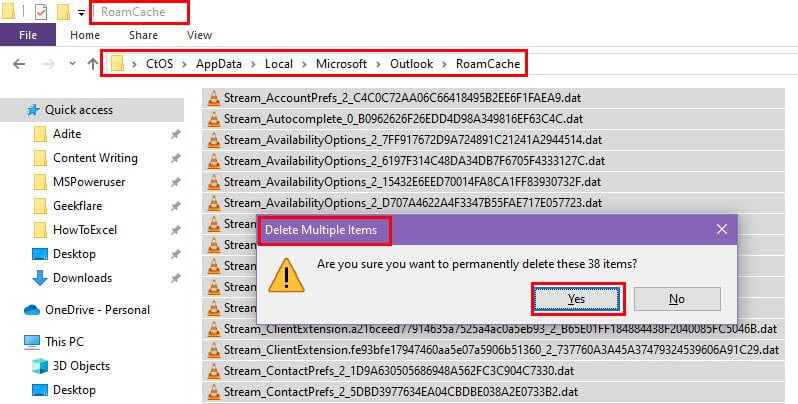
- The Microsoft Outlook local cache directory will open.
- Access the RoamCache folder.
- Delete everything inside this location.
Disable Syncing With Microsoft Exchange
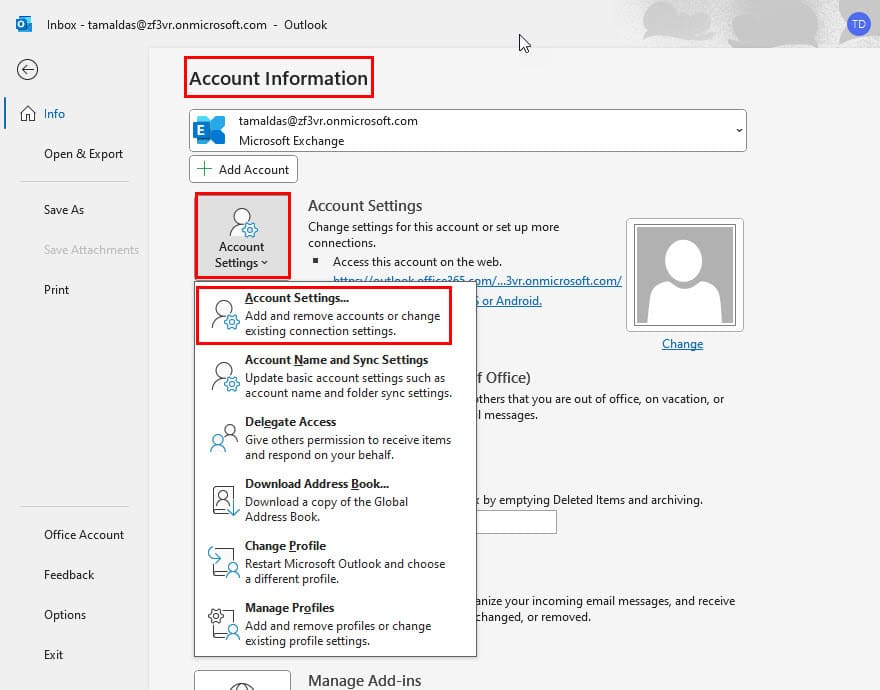
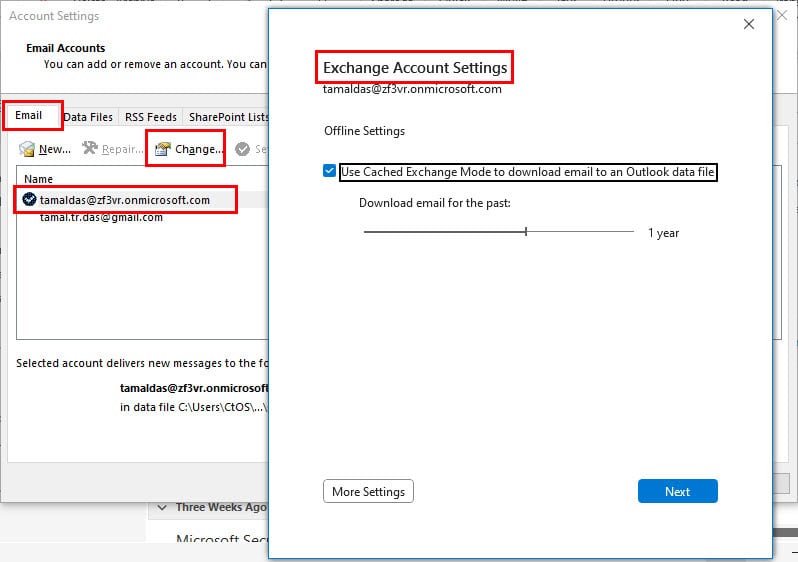
- Click on the File tab to go to the Account Information screen.
- Choose Account Settings from the drop-down menu.
- Select your Microsoft account from the Name list on the Email tab.
- Click Change above the Name table.
- You should now see the Exchange Account Settings dialog.
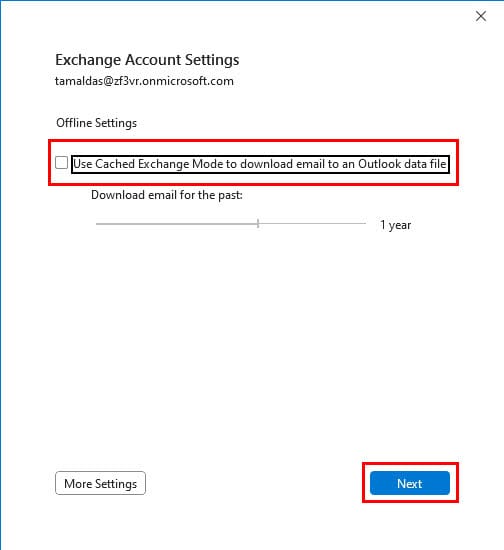
- Uncheck the box for Use Cached Exchange Mode…
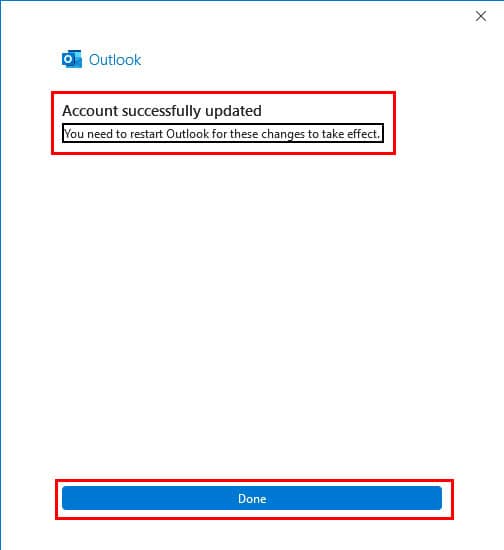
- Click Next and hit the Done on the Account successfully updated dialog box.
Use Cached Exchange Mode
If you’ve already been using the non-cached Microsoft Exchange mode, you can try turning this setting on.
Simply follow all the steps mentioned in the previous method.
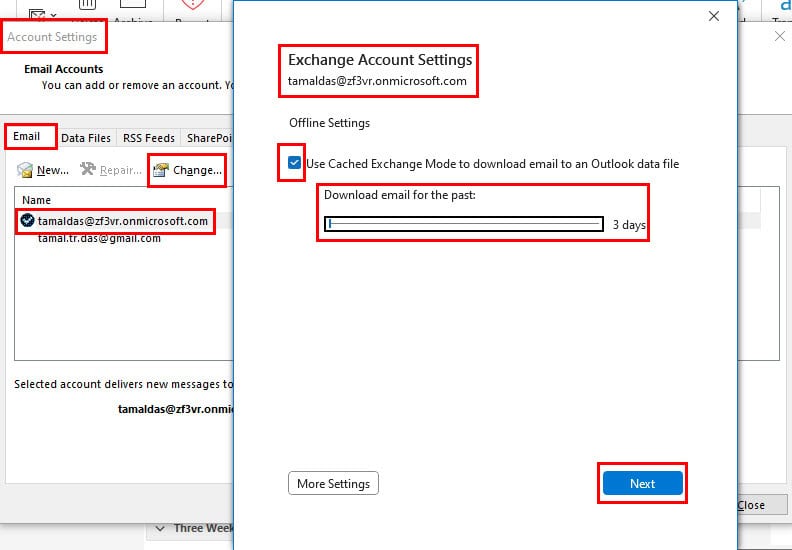
When you arrive at the Exchange Account Settings dialog box, checkmark the box for the Use Cached Exchange Mode… setting.
Click the slider in the Download email for the past section and drag it to the left side to reduce the cut-off to three days.
Click Next and hit Done on the window that pops up to save the setting.
Remove Any Additional Email Accounts
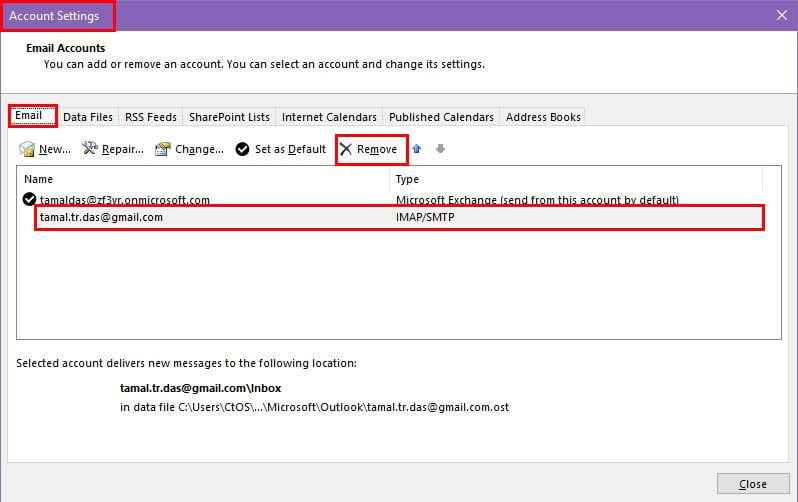
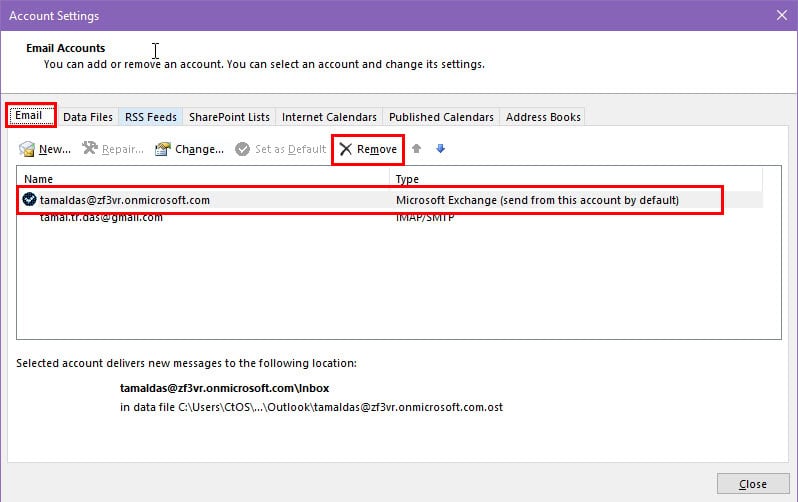
If there’s more than one Microsoft or third-party email account set up in the Outlook desktop app, try removing all except the one you’re currently using. Keep the account where you’re facing the ‘Microsoft Outlook: Contacting the server for information’ error. Here’s how:
- Go to the Outlook File menu and click the Account Settings button.
- Select Account Settings again in the drop-down menu that opens.
- You should see a list of all the synced email accounts.
- Select an email you wish to remove from the Name table.
- Click on the Remove button in the Email tab toolbar.
- Follow Outlook’s on-screen instructions to complete the removal process.
- Repeat the above steps for other emails except for the default, primary, or Microsoft 365 work account.
Tweak the Trust Center Settings
A safety setting disallows images and other media to load on all incoming emails, especially those coming from new email domains or third-party servers. If it’s enabled, the error often shows up.
Here’s how to disable it in the Trust Center:
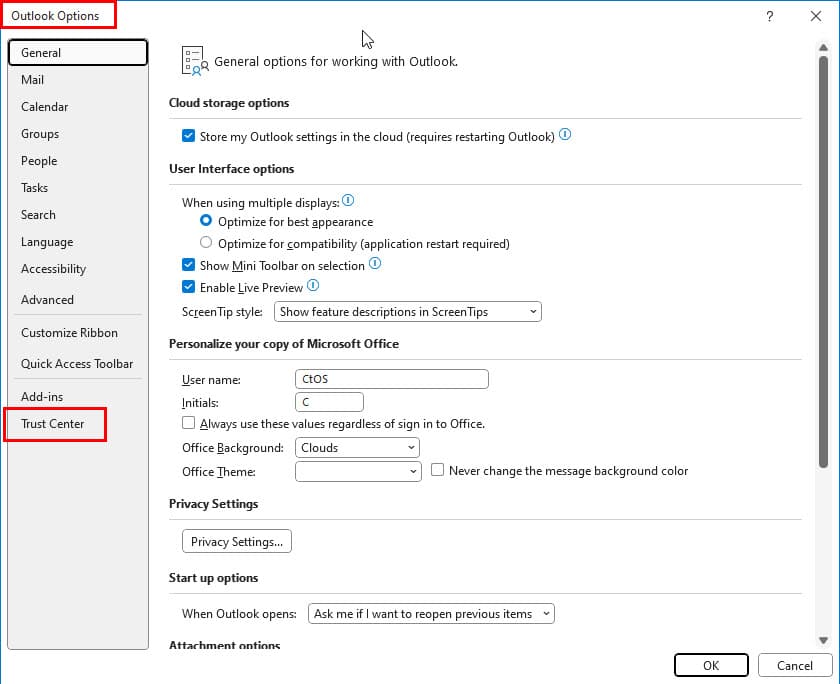
- On the desktop app, press the Alt + F + T keys together to bring up the Outlook Options dialog box.
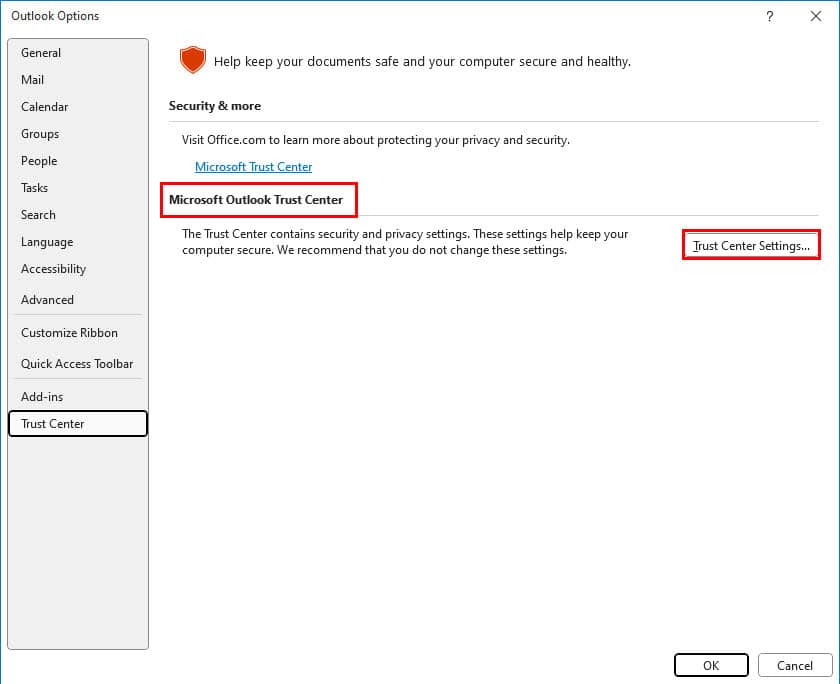
- Click on the Trust Center menu on the left-side navigation panel.
- Select the Trust Center Settings button below the Microsoft Outlook Trust Center section.
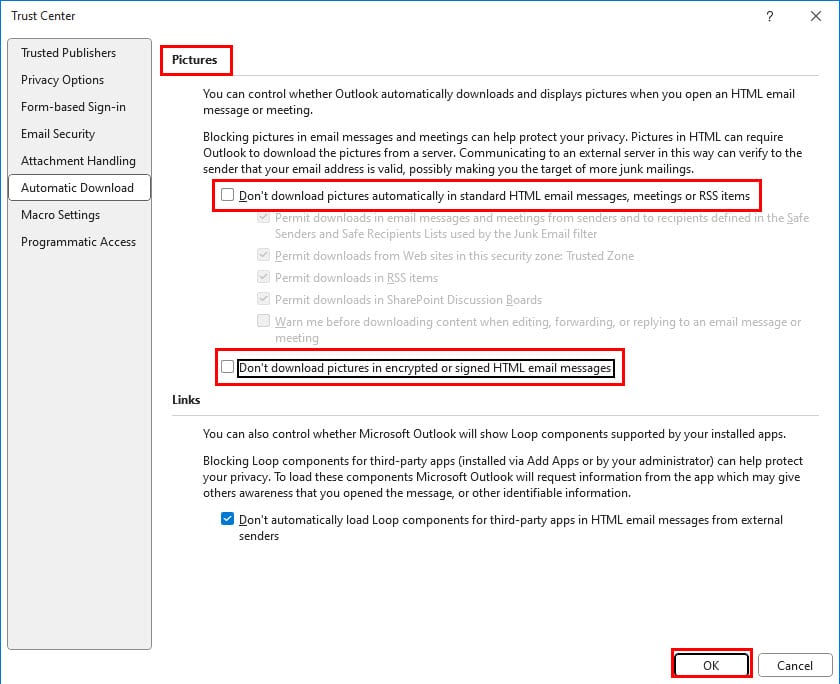
- Uncheck the boxes for the following settings:
- Don’t download pictures automatically in standard HTML email messages, meetings, or RSS items.
- Don’t download pictures in encrypted or signed HTML email messages.
- Click OK to save.
Close Outlook from Task Manager and re-open to check if you resolved the issue.
Launch Outlook in Safe Mode
Outlook Safe Mode disables all integrations and add-ins. It’s one of the best ways to determine if any third-party or Microsoft Office add-in is the root cause behind this error message. Here’s how to launch it:
- Close the desktop app.
- Check the Task Manager Processes column to ensure that it’s closed completely.
- Now, press the Windows and R keys together to bring up the Run command.
- Enter outlook.exe /safe in the Open box and hit Enter to execute the code.
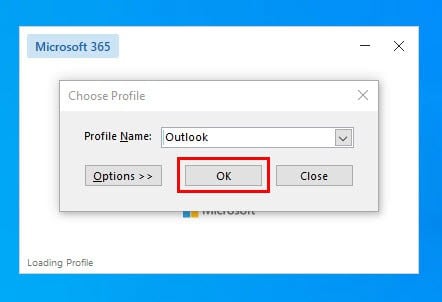
- A dialog box will prompt you to select a profile.
- Select the default Outlook profile by clicking the drop-down menu.
- Click OK to approve.
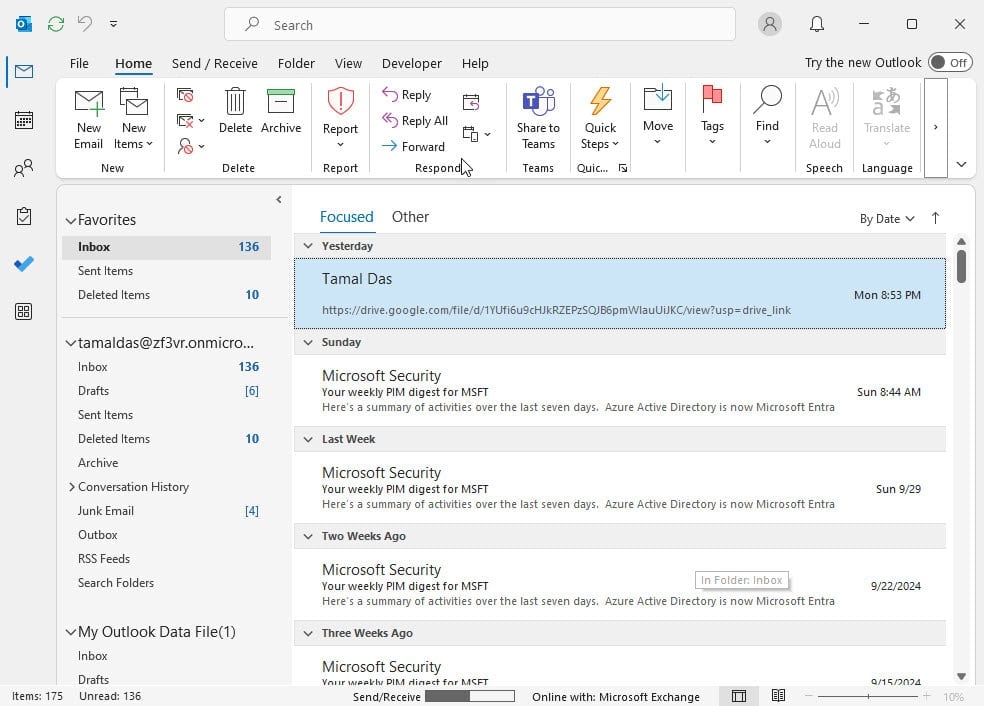
- You’ll see a default view of the desktop app running no third-party add-ins.
- Now, check if accessing any email or its attachments shows an error message or not.
If the issue is fixed after accessing Outlook in Safe Mode, you should uninstall the most recent add-in. Or, you might need to remove all of the installed add-ins. Here’s how to do that:
- Close Outlook Safe Mode.
- Relaunch normally.
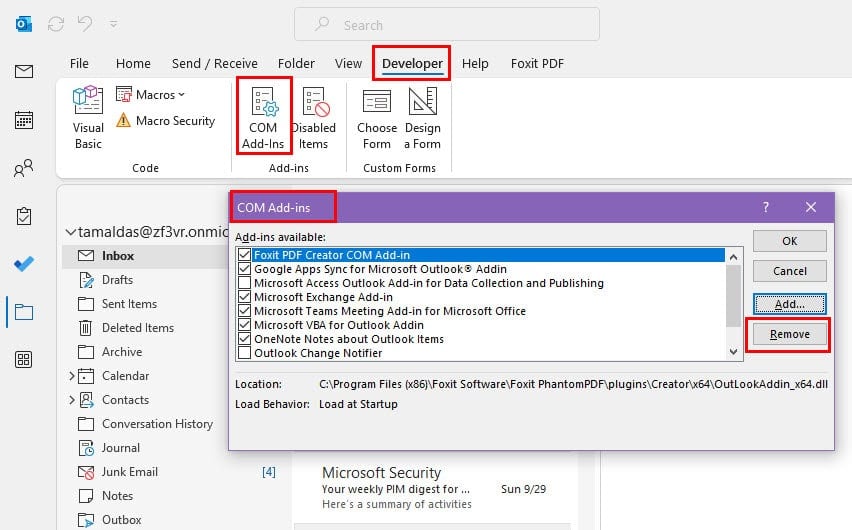
- Go to the Developer tab and click on the COM Add-Ins command button inside the Add-ins command block.
- Checkmark the add-ins you want to remove in the COM Add-ins dialog box.
- Click the Remove button and follow the on-screen instructions.
Repair the Outlook Installation
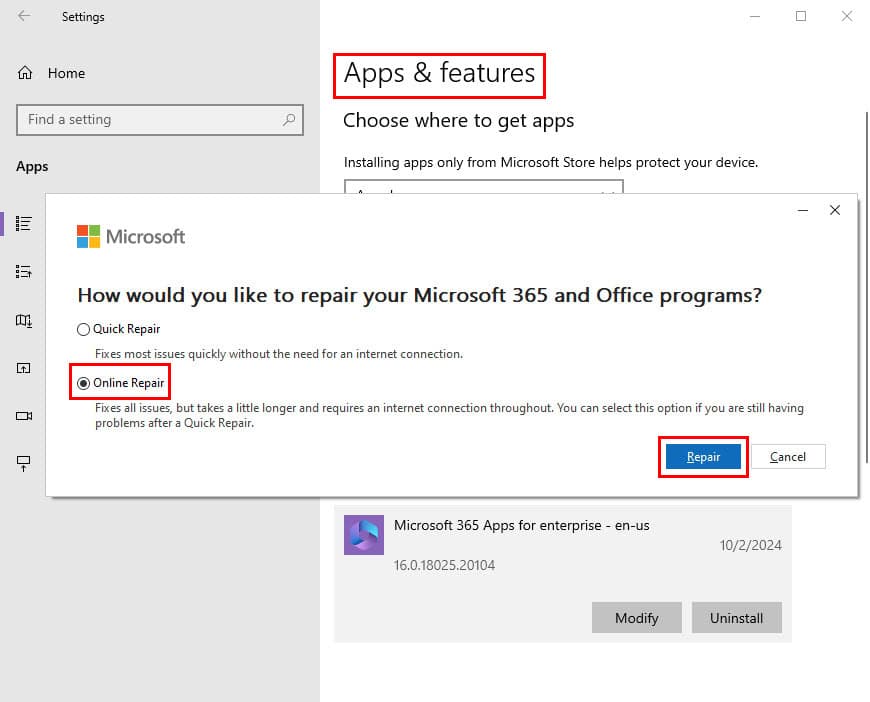
This method involves repairing the whole Microsoft 365 installation if you’re using the latest Microsoft Office software package. For earlier editions, the steps are almost the same. However, you’ll get to repair only Outlook instead of all MS Office apps. Now, follow these steps:
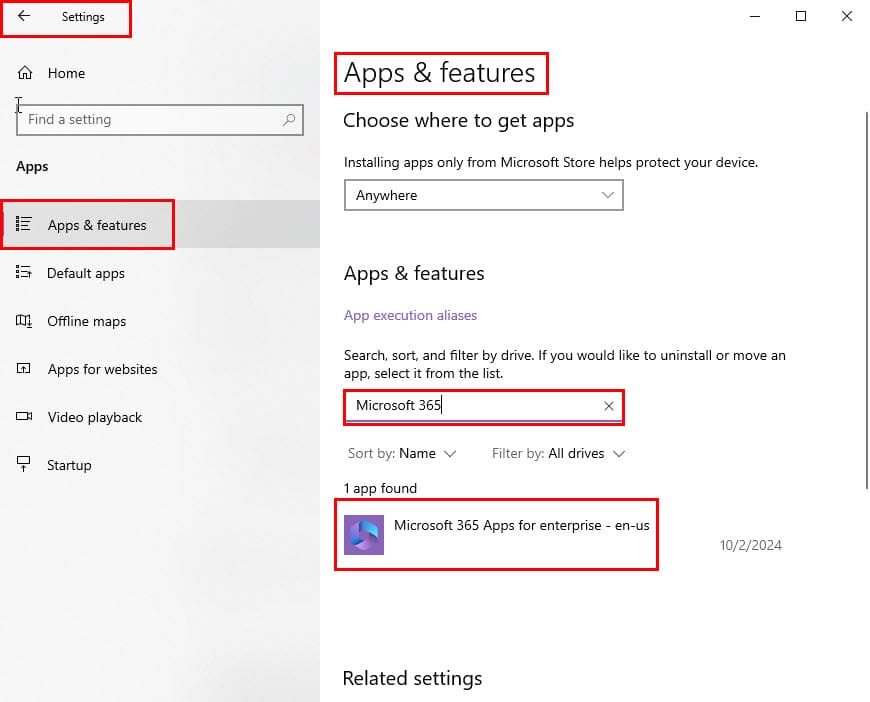
- Press Windows + I to launch Settings.
- Click on Apps to go to the Apps & features screen on the Windows Settings app.
- In the Search this list field, type in Microsoft 365 and hit Enter.
- Click on the Microsoft 365 Apps for enterprise card below the search box.
- Click on the Modify button and choose the Online Repair option.
- Hit Repair and follow the on-screen instructions.
- Ensure you’re connected to a reliable internet network for seamless repair of the Microsoft 365 installation package.
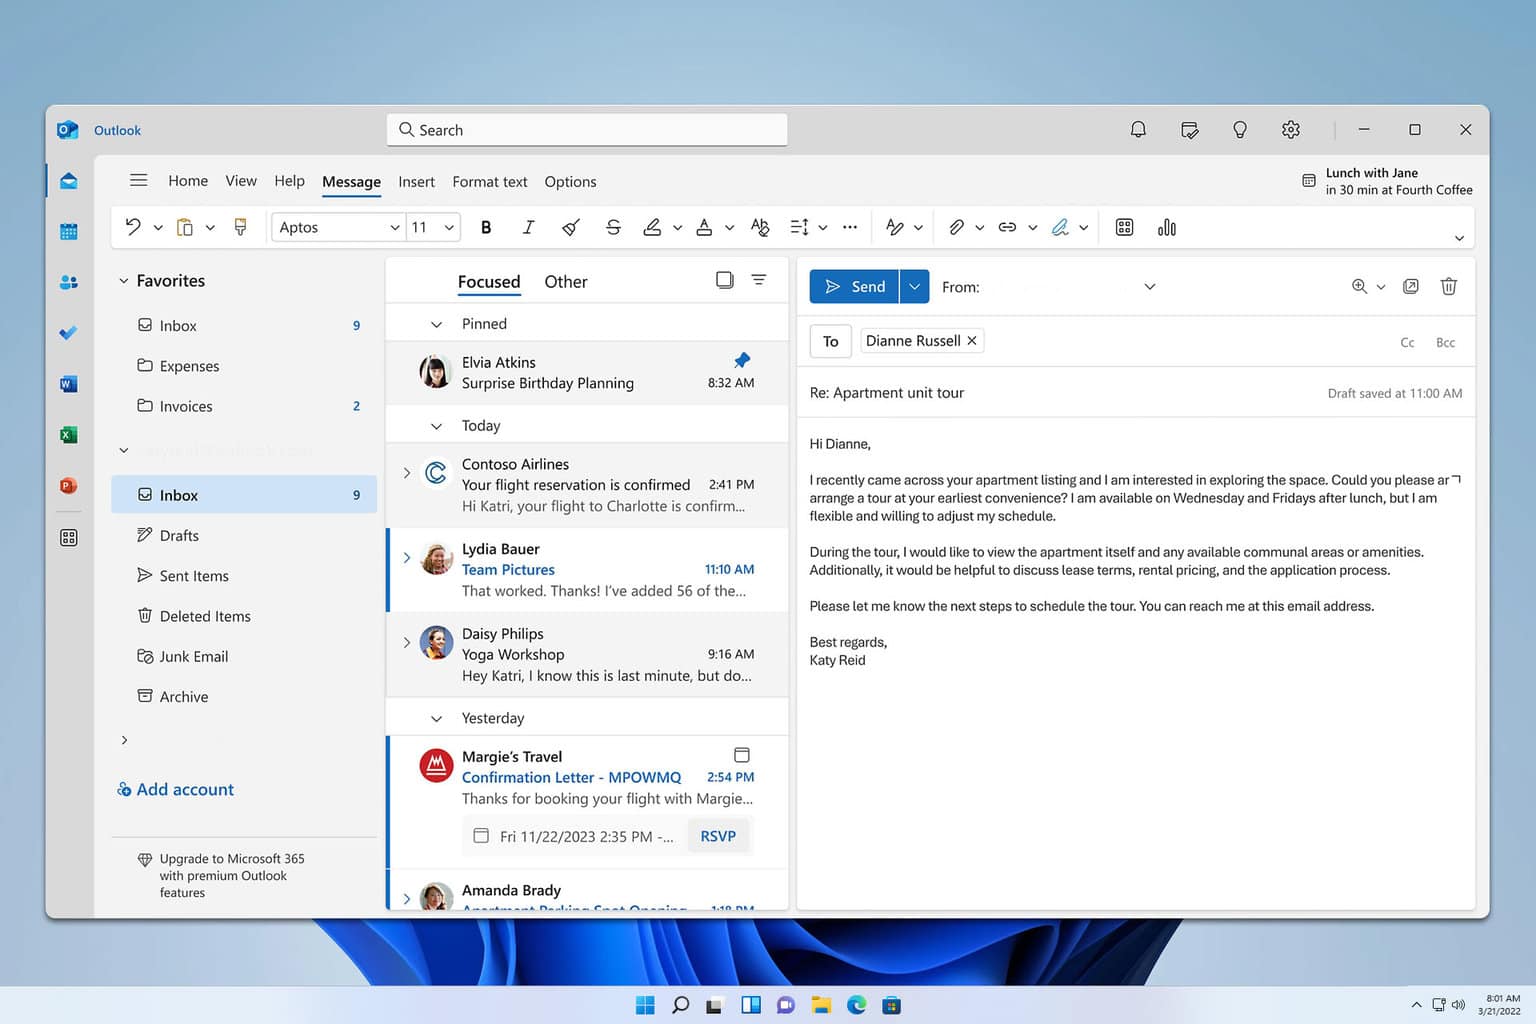
Update to the New Outlook Desktop App
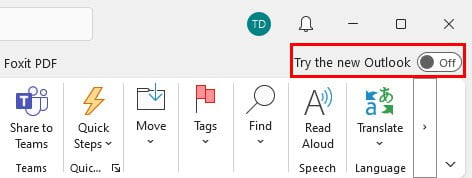
If you’re okay to move to the New Outlook experience, follow these steps:
- Open the desktop app.
- Click on Try the new Outlook toggle button in the top-right corner.
- Select Switch on the dialog box that pops up.
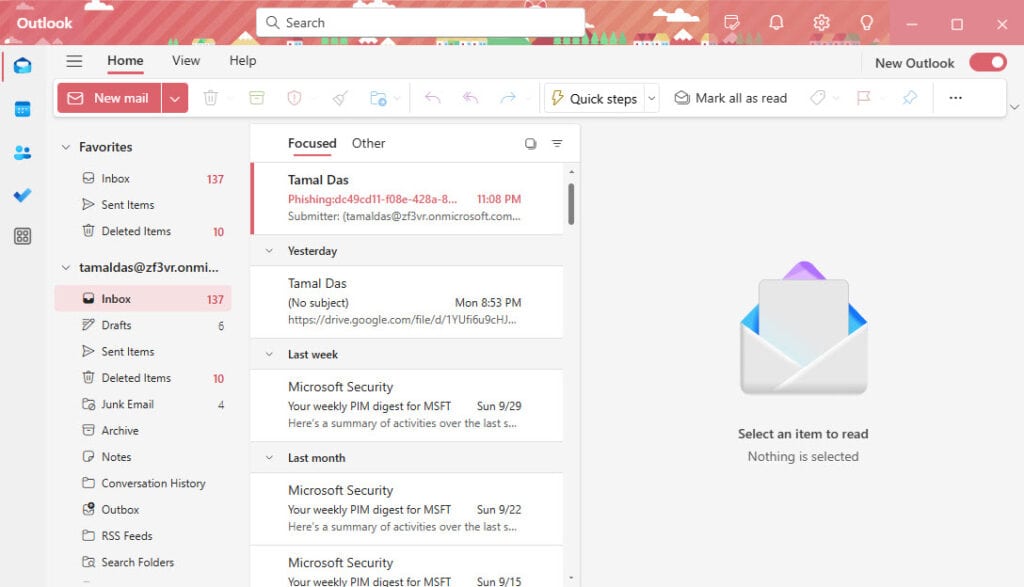
- The New Outlook will open.
If you don’t wish to use the new app even if that fixes the issue, skip this method and move on to the next.
Remove and Re-Add the Primary Email
- Go to the Email Accounts dialog box through File > Account Settings drop-down menu > Account Settings.
- Select the primary email.
- Click on the Remove button.
- Select Yes on the confirmation dialog box.
- Close Outlook.
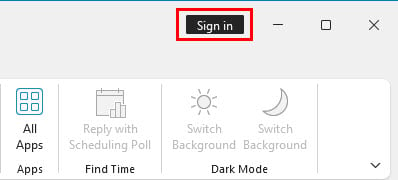
- Open it again and click on the Sign in button located in the top-right corner.
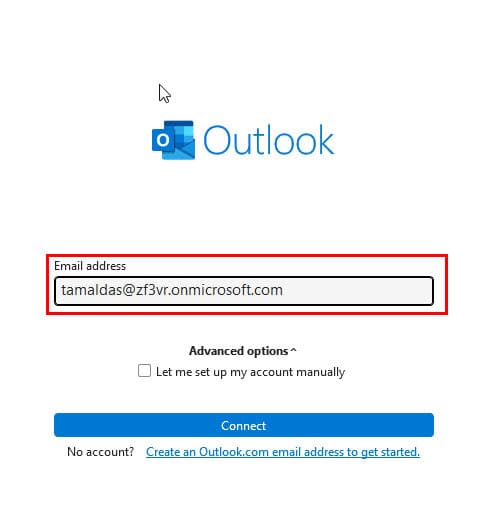
- Enter your email in the Email address field and hit Connect.
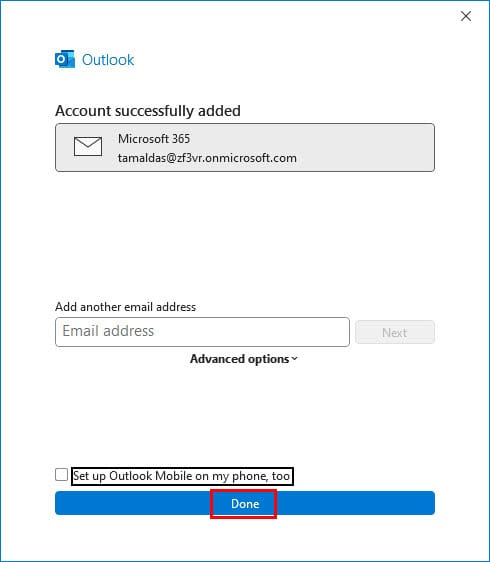
- Click Done on the Account successfully added dialog box.
- The Loading Outlook dialog box will show up.
- Allow it a few minutes to retrieve your emails from Microsoft Exchange Server and create a local backup copy.
Raise a Service Request From Microsoft 365 Admin Center
If you’re the admin of your Microsoft 365 subscription or domain, follow these steps to raise a support ticket:
- Log in to the Microsoft 365 admin center.
- Click on Show all in the left-side navigation panel.
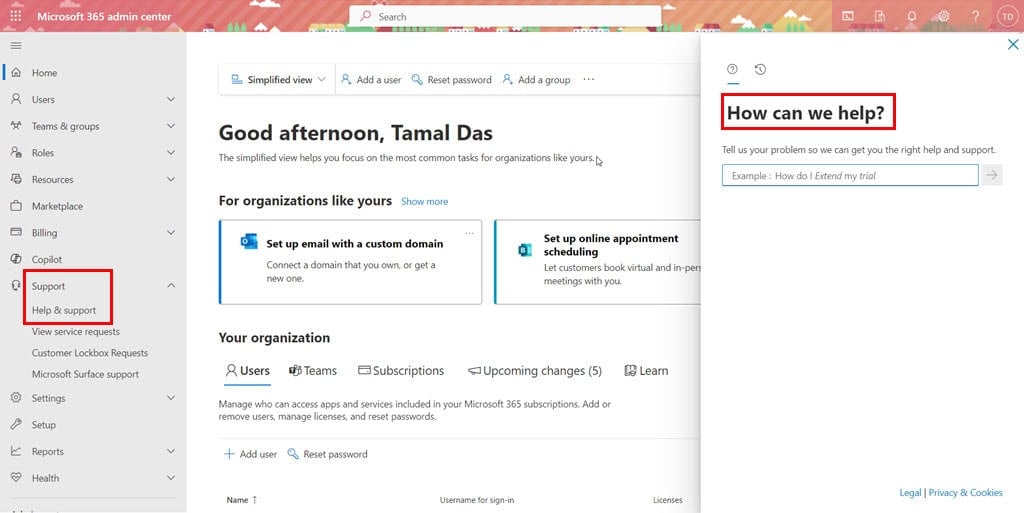
- Now, click on the Support drop-down menu.
- Select Help & support from the expanded menu.
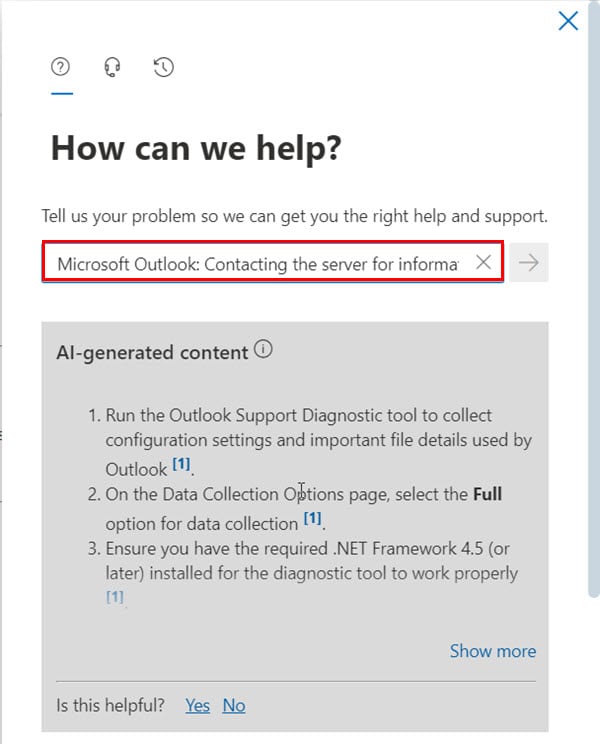
- In the field below How can we help? on the right-side panel, type in the issue you’re facing.
- Hit Enter.
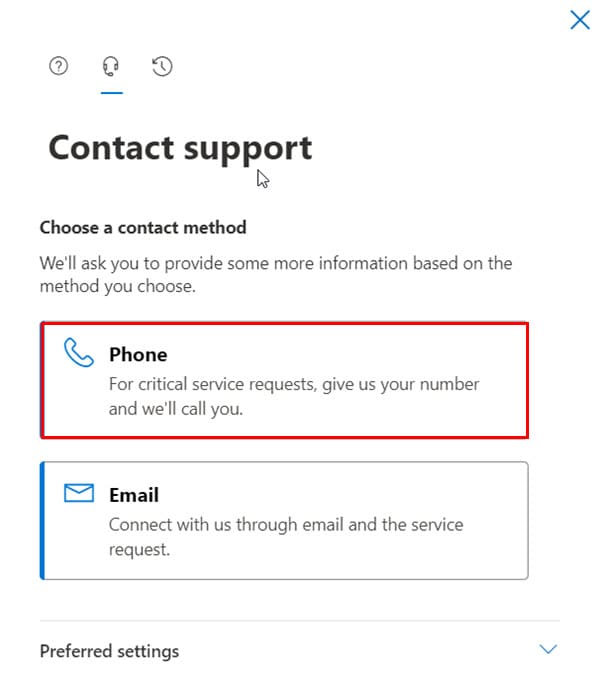
- Scroll down to the bottom and click on the Contact support button.
- You can choose Phone or Email options.
- Pick one and follow the on-screen instructions.
Summary
These are some of the proven ways to fix the ‘Microsoft Outlook: Contacting the server for information’ error on a Windows PC.
Were you able to resolve the issue by following them? Do you know of a better method than the ones I’ve listed? Comment below to share your experience.
User forum
0 messages