Fix: ERROR_NO_MORE_SEARCH_HANDLES (0x71)
Regenerate search with a quick system maintenance
5 min. read
Published on
Read our disclosure page to find out how can you help Windows Report sustain the editorial team Read more
Whether you’re performing a search on your system or within an application, you ay run into an ERROR_NO_MORE_SEARCH_HANDLES error that indicates No more internal file identifiers are available.
You’ll most likely encounter this error during a search query in File Explorer for special characters or other applications that perform extensive file or resource searches. You’ll notice that your system slows down or the application in question becomes unresponsive or crashes.
This error can be triggered if you have too many processes running in the background with little to no system resources to handle this load. If it is app-related, it could be a case of compatibility issues or an issue with memory management.
How do I fix the ERROR_NO_MORE_SEARCH_HANDLES?
1. End superfluous processes
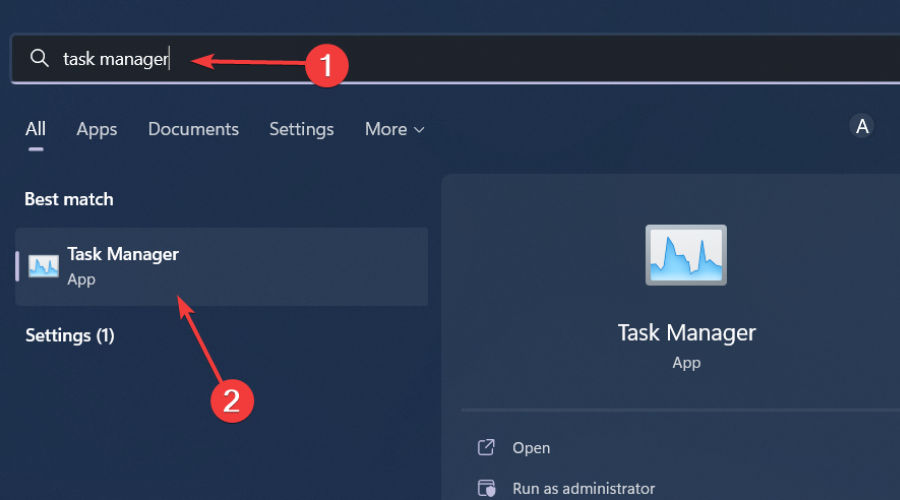
- Hit the Windows key, type Task Manager in the search bar, and click Open.
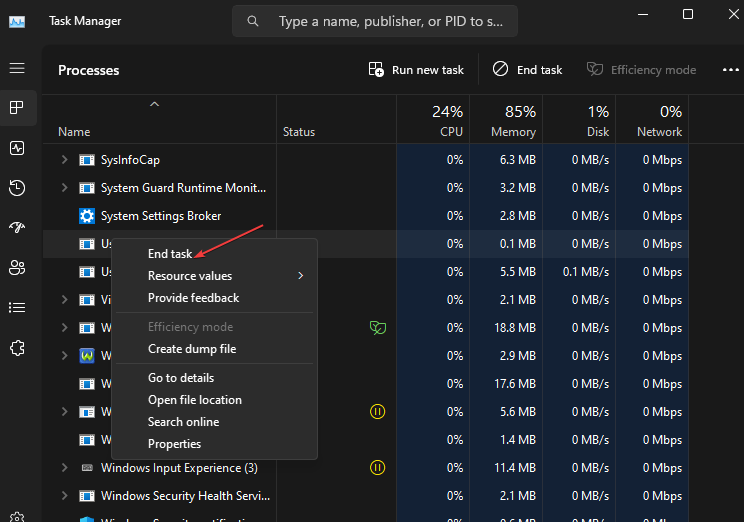
- Navigate to the Processes tab, and find any unnecessary processes.
- Right-click on it and select End task.
- Repeat this step until you remain with only necessary ones.
If you’d like ore insight on the number of processes you should be running on your Windows 11, check out our detailed article and see how many you can get rid off. If you’re not sure whether it is a critical process, check the process’s ID.
2. Clean up your drive
2.1 Run a disk scan
- Press Windows + E to open File Explorer.
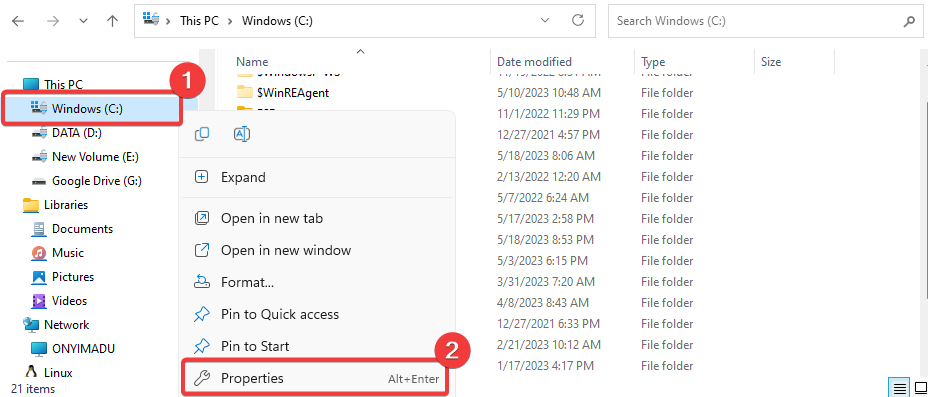
- Navigate to the drive where the problematic program is stored (this is typically labeled Windows (C)). Right-click on it and select Properties.
- Select the Tools tab and click the Check button.
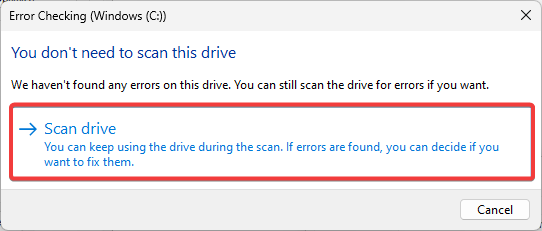
- Finally, click on Scan drive.
- The scan will commence, and you should follow any prompts given.
2.2 Perform a Disk Cleanup
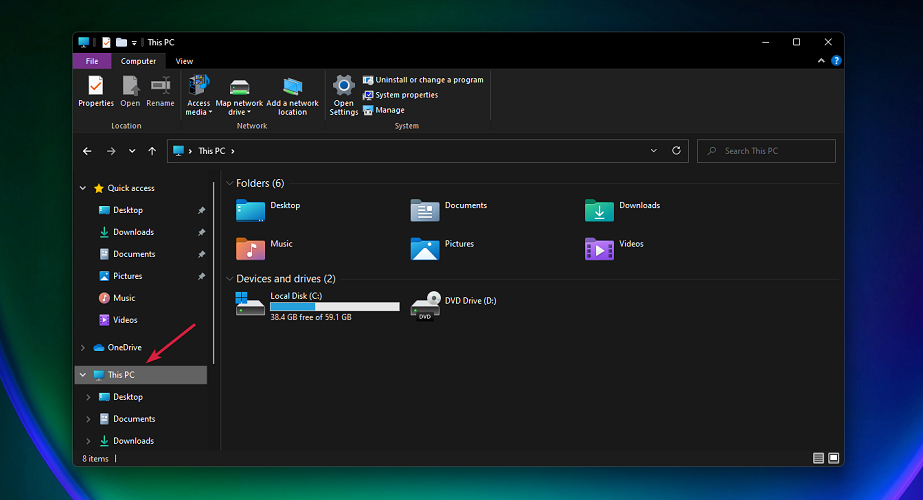
- Press the Windows + E keys combination to start File Manager.
- Click on This PC.
- Now right-click the C: drive and select Properties from the drop-down menu.
- In the General tab, click on Disk Cleanup to start the app.
- Select the data you want to delete by clicking the corresponding boxes, then on OK.
3. Resolve Search issues
 NOTE
NOTE
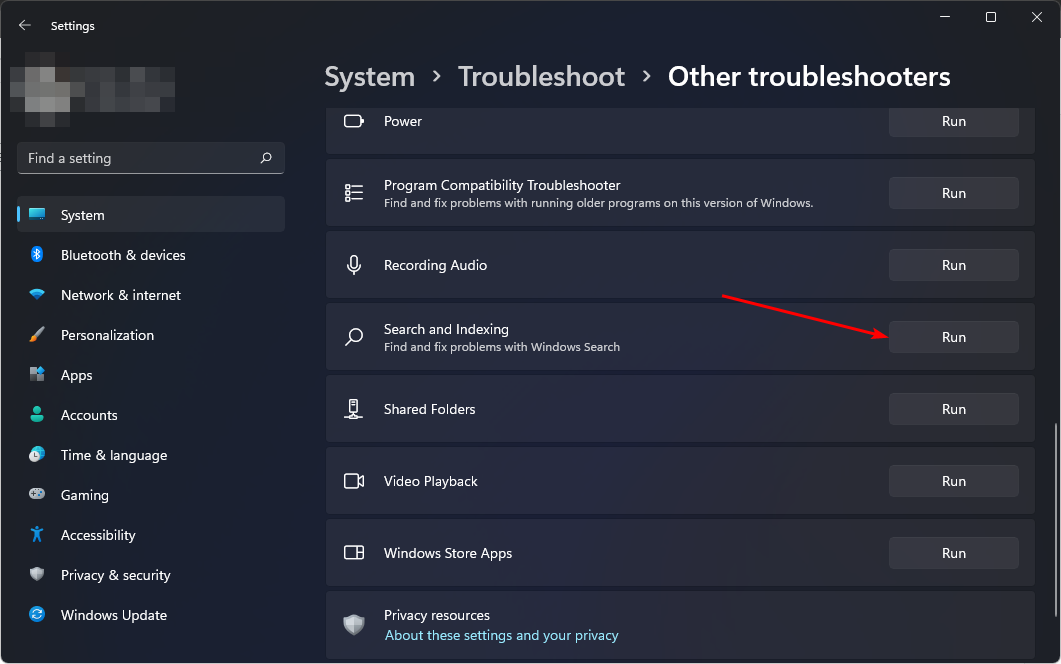
3.1 Run the Search and Indexing troubleshooter
- Hit the Windows key and select Settings.
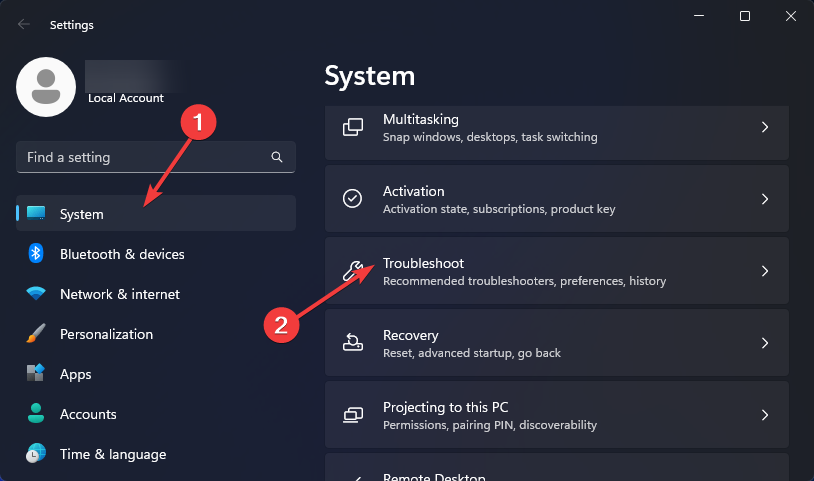
- Select System and click on Troubleshoot.
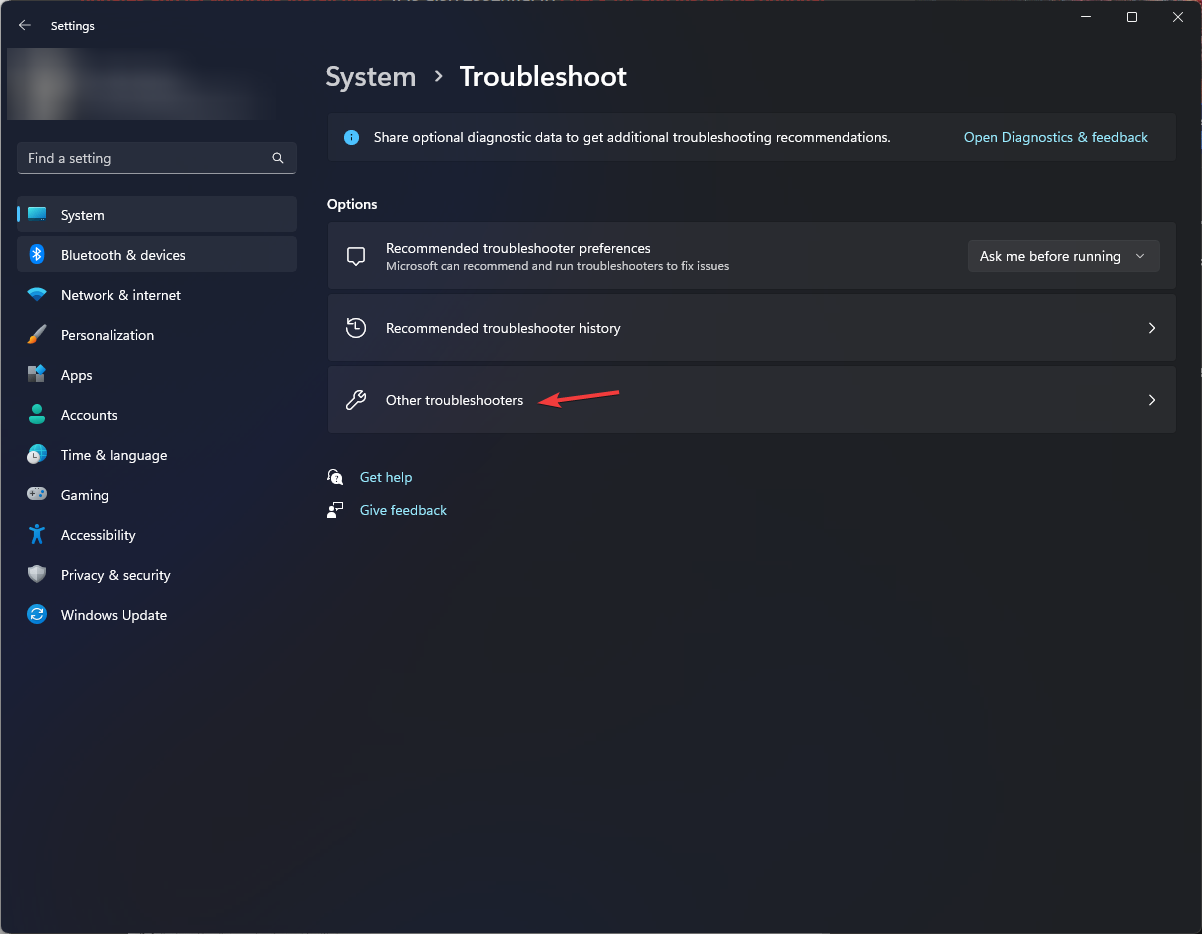
- Click on Other troubleshooters.
- Navigate to Search and Indexing troubleshooter and click the Run button next to it.
Running the troubleshooter could identify any issues that may be causing the search to be slow and restore it to normalcy.
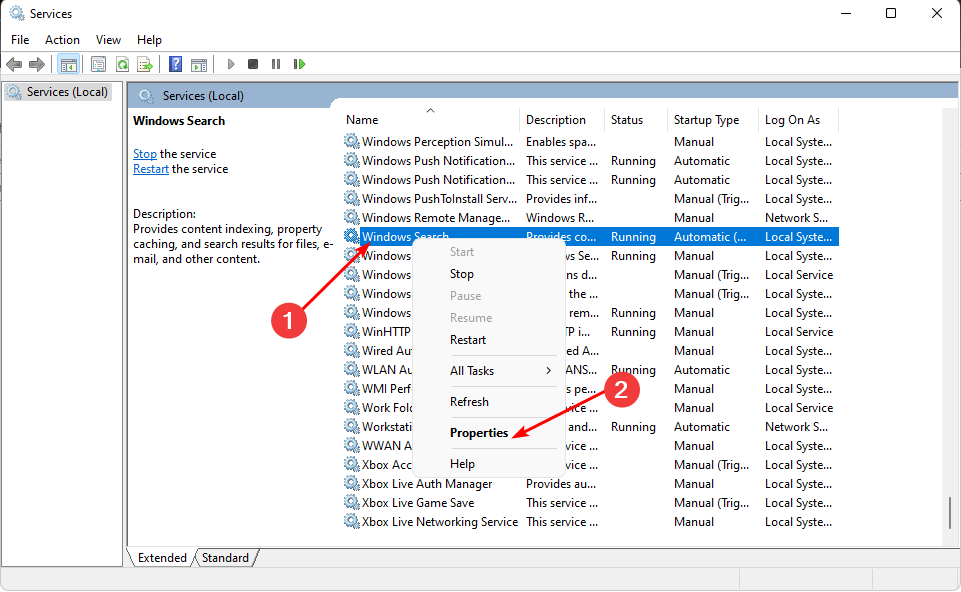
3.2 Restart the Search service
- Hit the Windows + R keys to open the Run command.
- Type services.msc in the dialog box and hit Enter.
- Locate Windows Search, right-click on it, and select Properties.
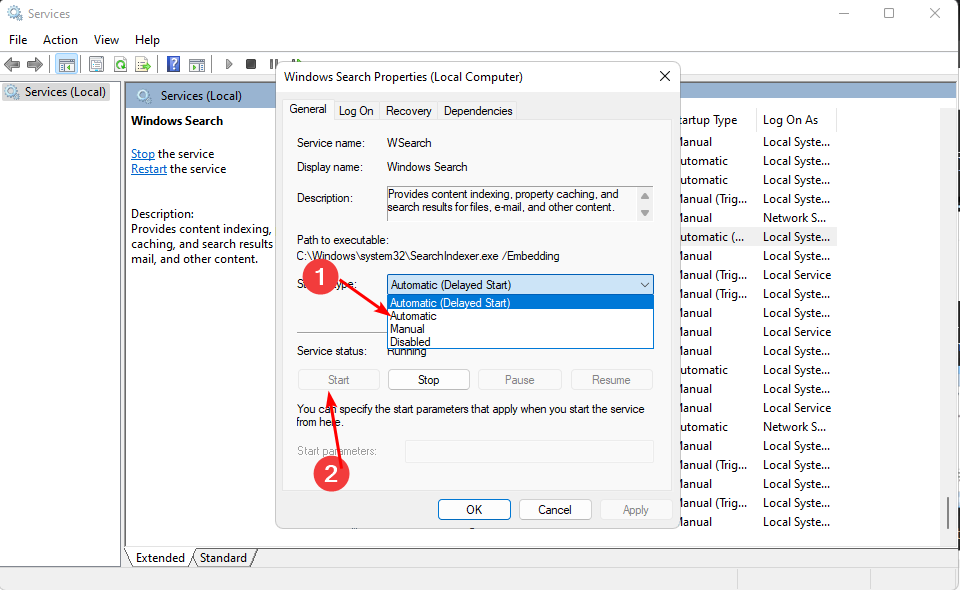
- Go to Startup type, and in the drop-down menu, select Automatic, then click Start.
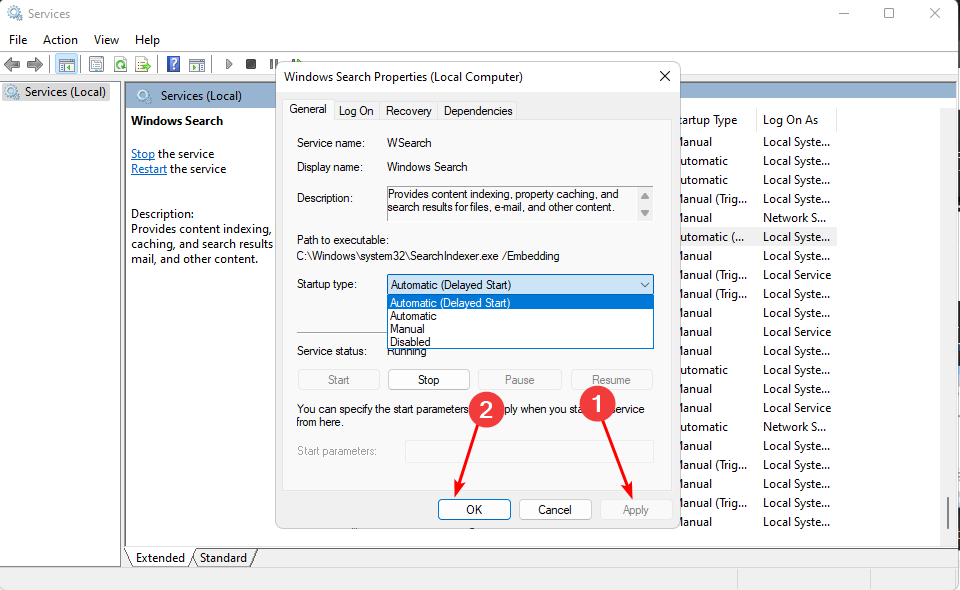
- Click Apply, then OK to save changes.
- Restart your PC and see if the issue persists.
Restarting the service basically resets the search process so if there were any glitches, they’ll be resolved.
3.3 Rebuild the search index
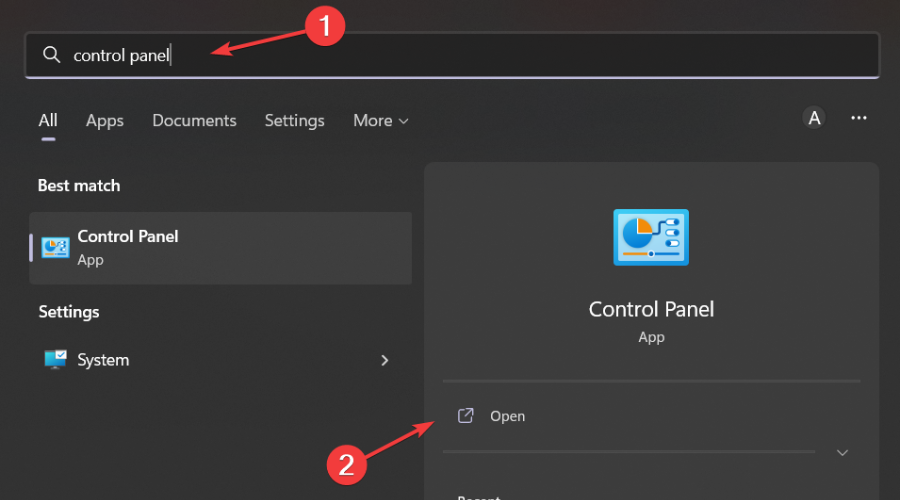
- Hit the Windows key, type Control Panel in the search bar, and click Open.
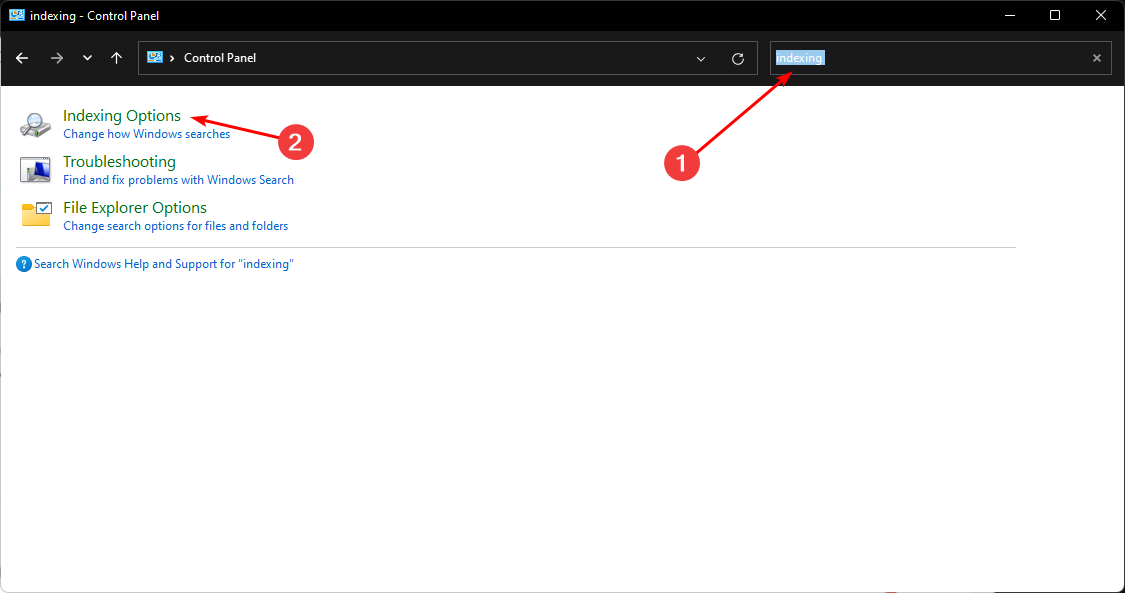
- Search for Indexing Options in the Control Panel search bar and click to Open.
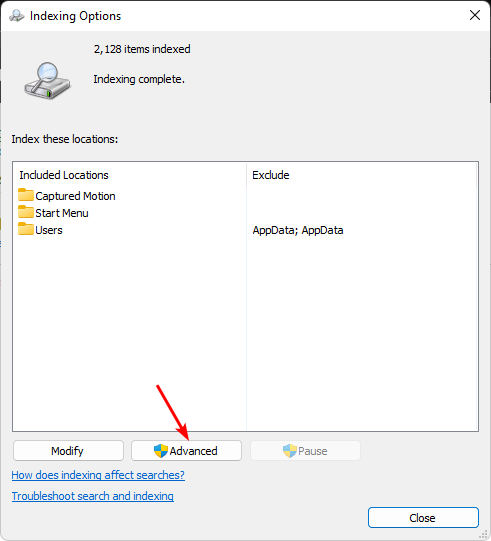
- In the Indexing Options dialog box that opens, select the Advanced option.
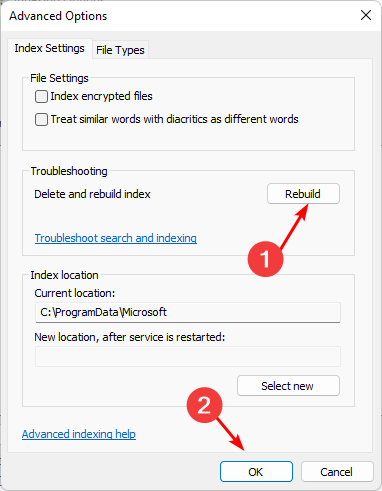
- Click Rebuild under Troubleshooting in the Advanced Options dialog box that pops up.
- Press OK to confirm that you want to rebuild. Note that it may take a while, so ensure you don’t have any pressing matters when performing this step.
Rebuilding the search index can clear cache that may be corrupt and enable a restart enhancing efficiency.
4. Check for viruses
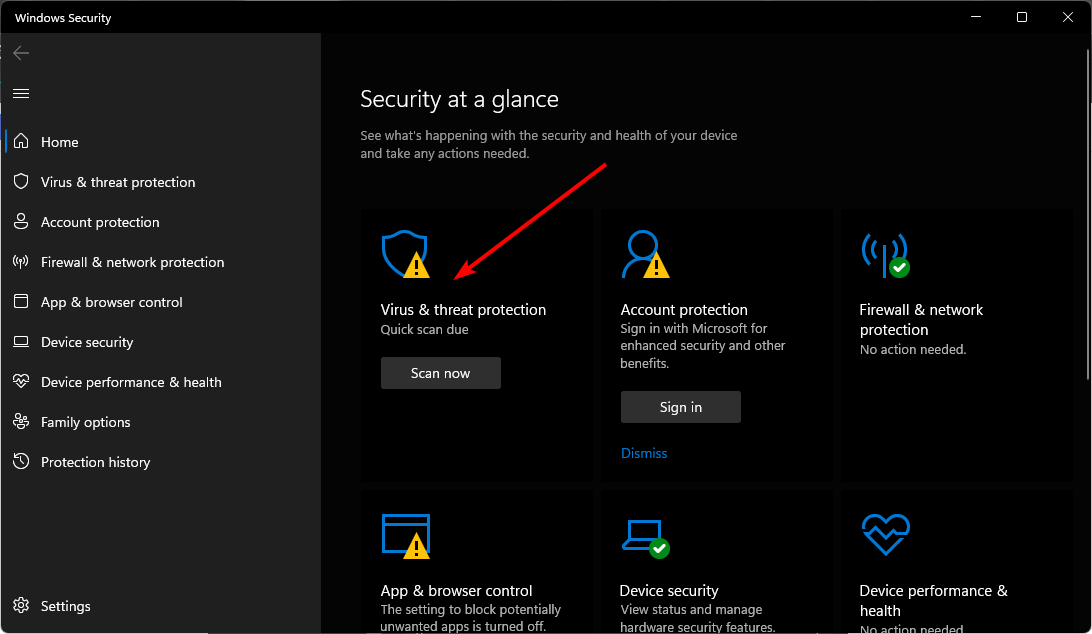
- Press the Windows key, search Windows Security, and click Open.
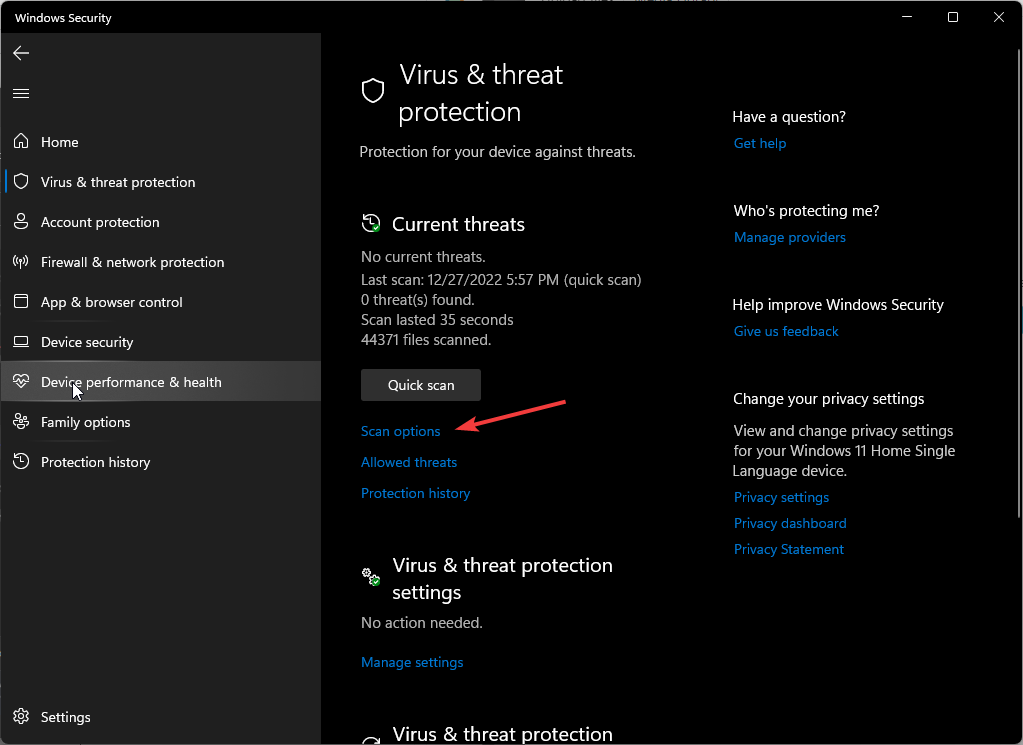
- Select Virus & threat protection.
- Next, press Quick scan under Current threats.
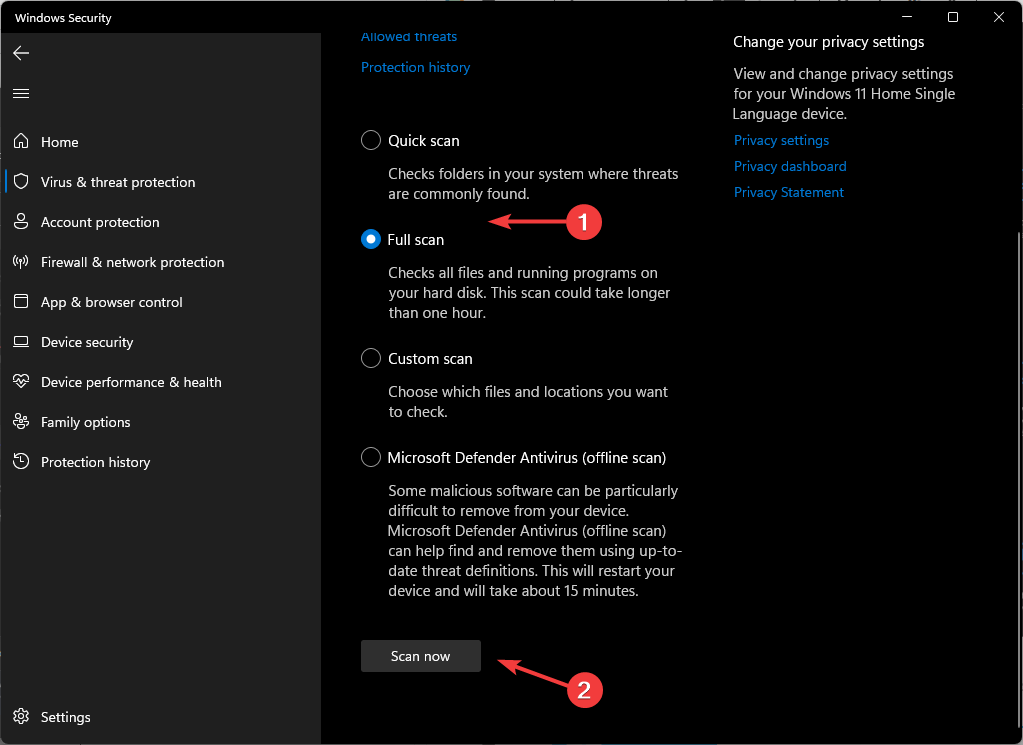
- If you don’t find any threats, proceed to perform a full scan by clicking on Scan options just below Quick scan.
- Click on Full scan, then Scan now to perform a deep scan of your PC.
- Wait for the process to finish and restart your system.
5. Run the Performance and Maintenance troubleshooter
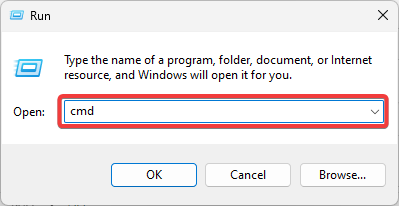
- Press Windows + R to open the Run dialog.
- Type cmd and hit Ctrl + Shift + Enter to open an elevated Command Prompt.
- Input the command below and hit Enter to run the Performance troubleshooter.
msdt.exe /id PerformanceDiagnostic - Input the command below and hit Enter to run the Maintenance troubleshooter.
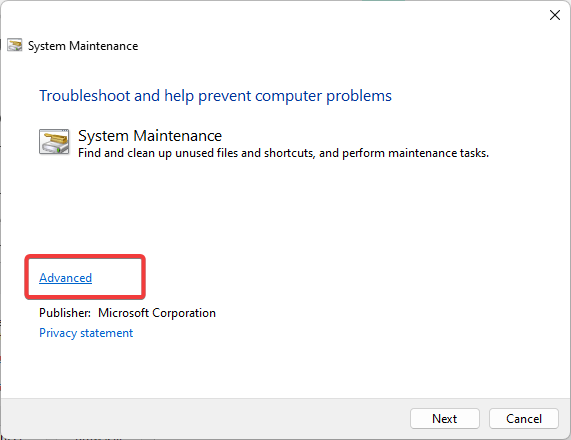
msdt.exe /id MaintenanceDiagnostic - Click on Advanced.
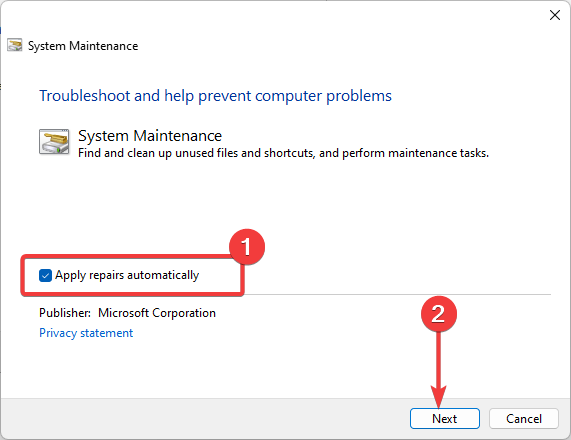
- Tick Apply repairs automatically and hit Next.
- Follow any additional prompts and wait for the fix to complete. Try the search query again and see if the error_no_more_search_handles persists.
Additional tips to prevent such errors
- Keep your system updated – Your OS, drivers and apps need to be updated to avoid compatibility issues.
- Monitor system resources – Make use of resource monitors to identify apps that need more system resources and limit as needed. You can also allocate more system resources for programs with extensive needs.
- Optimize your device – Make your Windows 11 faster for improved performance. Also ensure your OS is using all RAM.
- Get rid of bloatware – Regular Disk Cleanups and disk defragmentation will help keep your drive in top shape and avoid apps scrambling for available resources.
- Upgrade system resources – Where possible, you can increase your virtual memory, upgrade your CPU and RAM for better performance.
Also, if you’re searching on Windows 11, we have a few tips to optimize your search so check out our detailed article. Hopefully, one of the above solutions has helped you get rid of ERROR_NO_MORE_SEARCH_HANDLES.
Do let us know if you have any other recommendations in the comment section below.










User forum
0 messages