Fix: Page Fault in Nonpaged Area on Windows 10
Explore the expert tested methods to fix the issue
5 min. read
Updated on
Read our disclosure page to find out how can you help Windows Report sustain the editorial team Read more
Key notes
- The error could have occurred due to corrupt RAM, a faulty driver, or a damaged NTFS drive volume.
- To fix it, you need to update drivers, uninstall the third-party security program, or run the CHKDSK command.
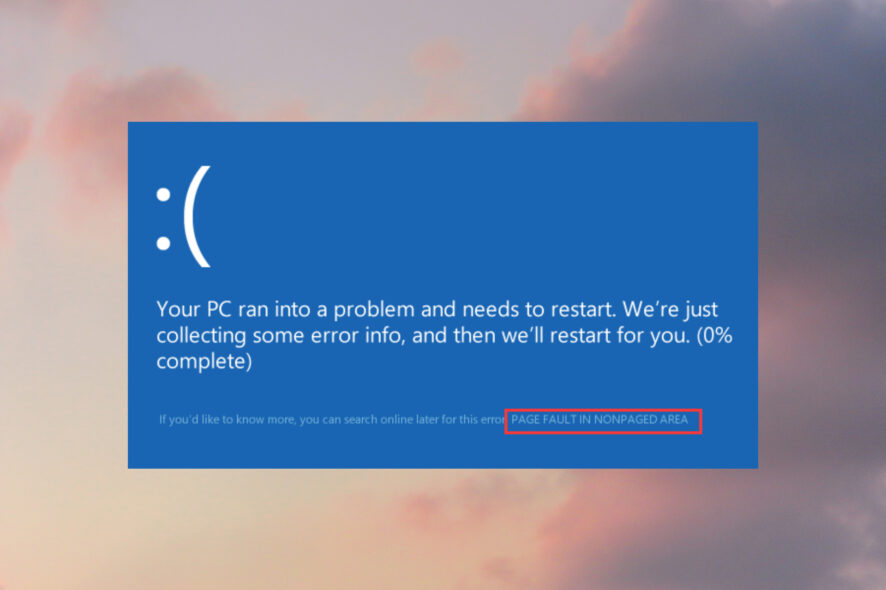
Encountering a Page Fault in Nonpaged Area error on Windows 10 indicates a problem with your computer’s memory or drivers, causing system crashes or the infamous Blue Screen of Death (BSoD).
In this guide, we will explore various techniques and solutions to resolve this error on Windows 10 to ensure the stability and smooth functioning of your Windows 10 system.
Why the Page Fault in Nonpaged Area error occurs on Windows?
There could be various reasons for the error; some of the common ones are mentioned here:
- Faulty or incompatible RAM – Problems with your computer’s RAM modules can trigger this error. Check for faulty hardware and improper installation of components on the motherboard.
- Corrupted system files – If essential system files become corrupt or damaged, it can lead to this error. Try running an SFC scan to repair the system files.
- Outdated or incompatible device drivers – Incompatible or outdated drivers, especially those related to disk drives, graphics cards, or network adapters, can cause conflicts and result in this issue.
- Hardware issues – Faulty hardware components, such as a failing hard drive, faulty cables, or problematic peripherals, can contribute to this error.
- Overclocking – If you have overclocked your CPU or RAM beyond stable limits, it can lead to memory-related errors, including this one.
Now that you know the causes, let’s dive in and troubleshoot this frustrating error together.
How can I fix Page Fault in Nonpaged Area error on Windows 10?
Before engaging in advanced troubleshooting steps, you should consider performing the following checks:
- Check your PC’s RAM for dirt and debris and verify if they are properly seated.
- Check your hard disk for physical damage.
- Run Disk Cleanup to clean up old Windows update files.
- Disable the antivirus temporarily.
- Uninstall the third-party antivirus program.
Once you have conducted these checks, let us move on to the solutions to fix this problem.
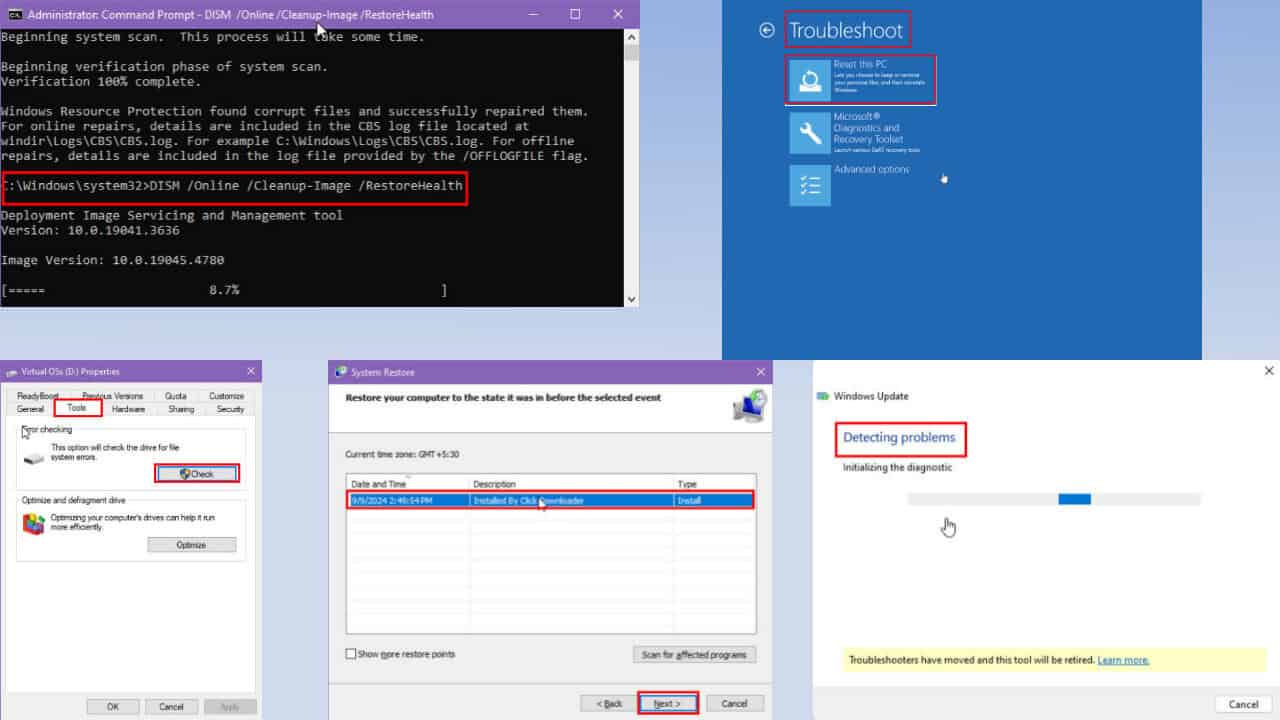
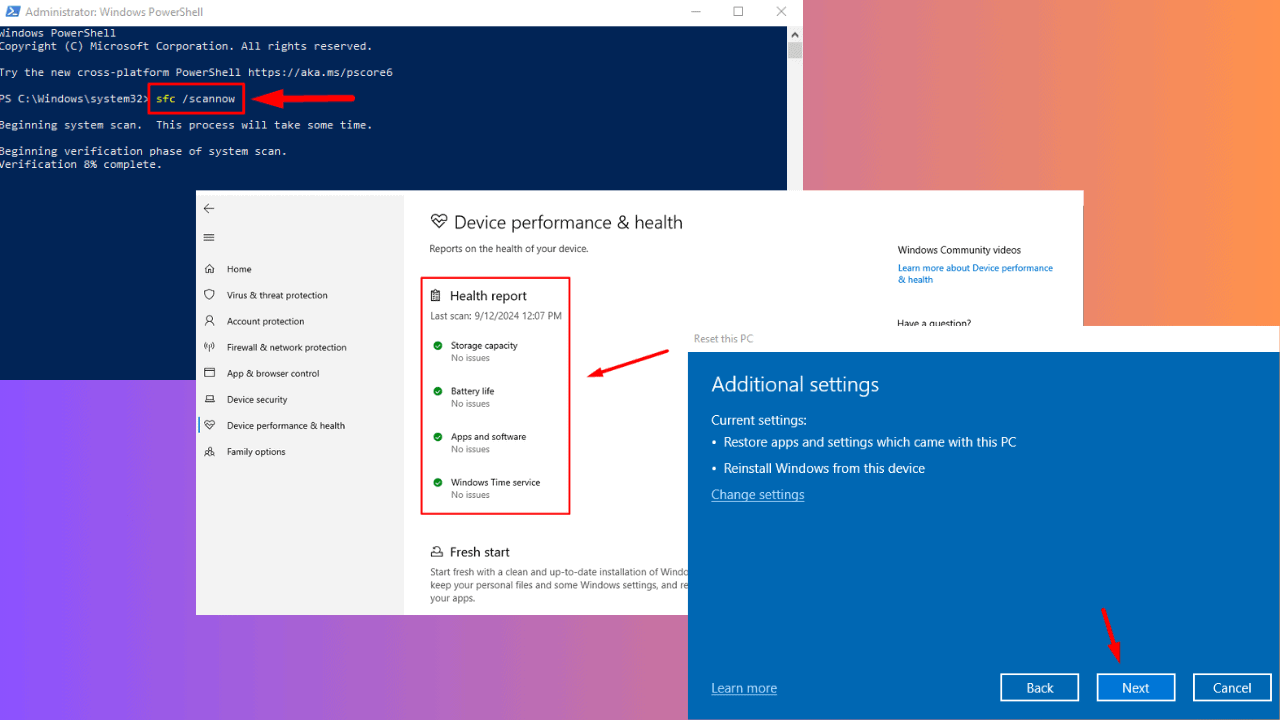
1. Run SFC and DISM scans
- Press the Windows key, type cmd, and click Run as administrator.
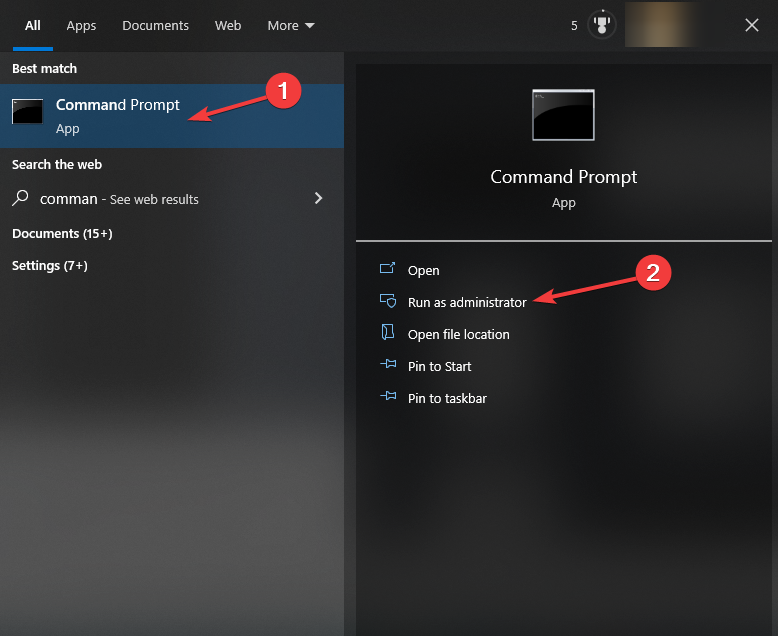
- Type the following command to repair system files and hit Enter:
sfc/scannow
- Wait for the command to complete, then copy & paste the following command to repair Windows OS files and press Enter:
Dism /Online /Cleanup-Image /RestoreHealth
- Once the command is executed, restart your PC to let the changes take effect.
Using this Windows scan process may help you, but it’s not guaranteed it will solve the error altogether.
Hence, you can make sure to entirely diagnose and fix corrupted system files using a high-end system repair tool.
2. Check the disk
- Press the Windows key, type cmd, and click Run as administrator.

- Type the following command to check the disk & attempt to repair sectors on your hard drive and hit Enter:
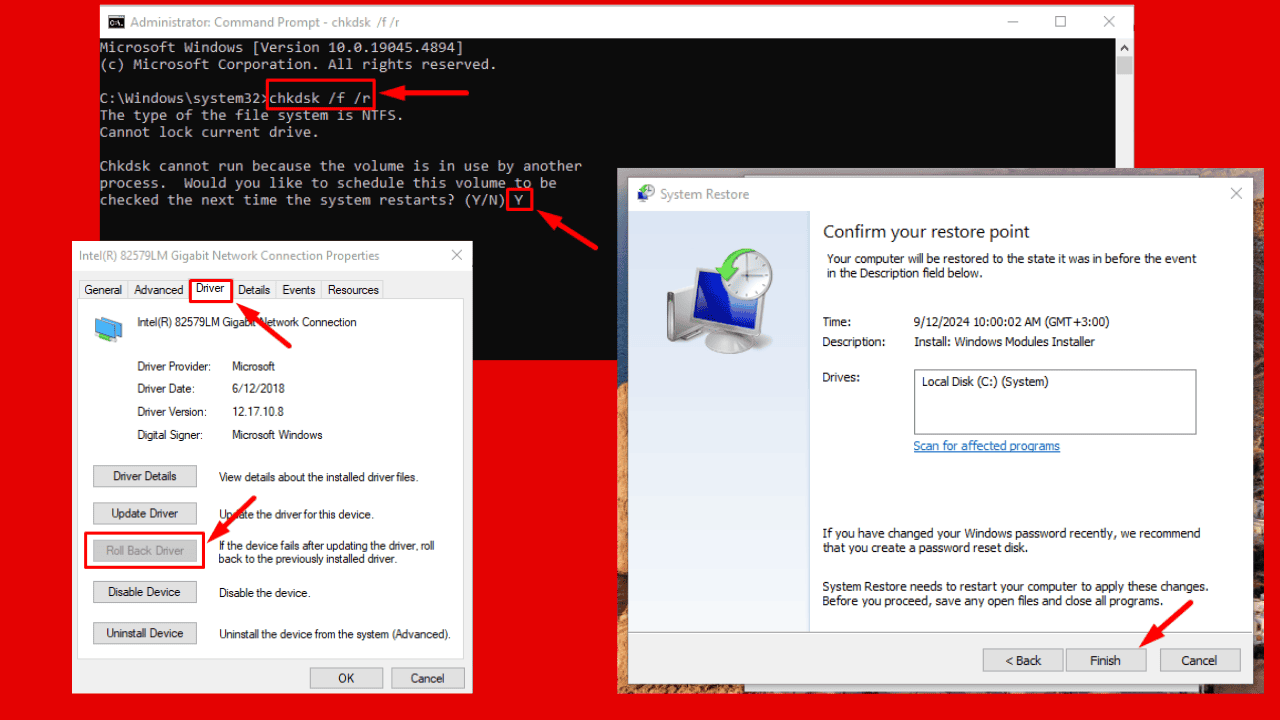
chkdsk /f /r
It scans your hard drive for corrupted files, repairs bugs, and cleans up disk space to maintain your computer’s health.
3. Update the device drivers
- Press Windows + R to open the Run console.
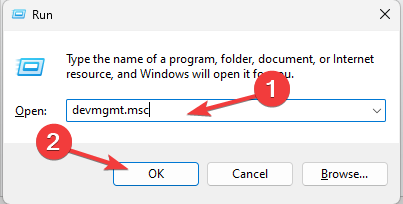
- Type devmgmt.msc and click OK to open the Device Manager.
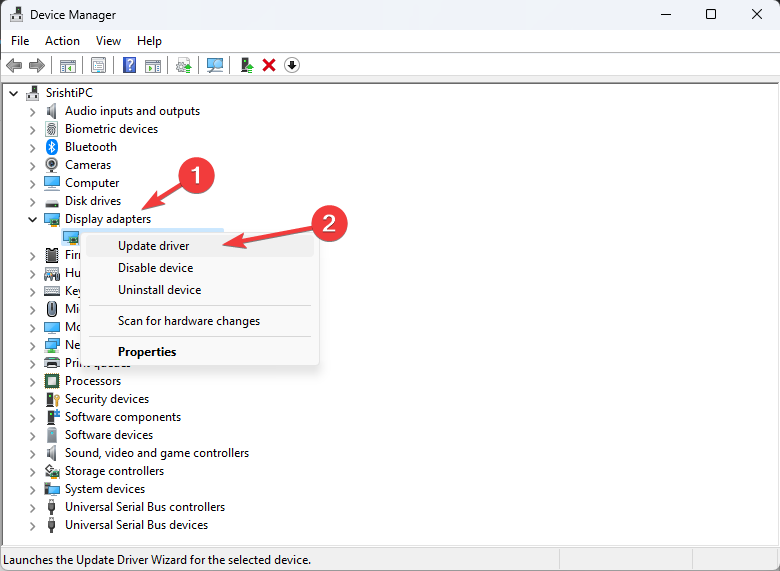
- Check all the critical drivers, such as graphics cards, network adapters, and device processors; here, we will demonstrate how to update drivers by using graphics cards.
- Locate and Display adapters, right-click the driver, then select Update driver.
- Click Search automatically for drivers.
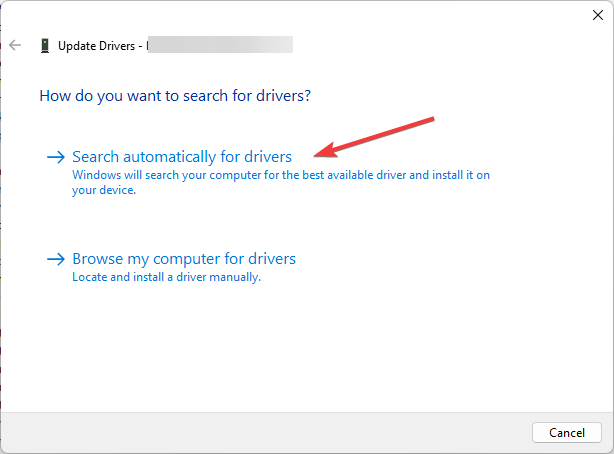
- Follow the onscreen instructions to complete the process.
Now check all the important device drivers to ensure all are updated and installed correctly.
If the manual process didn’t solve the Windows issue, you can better update the driver fully automatically with a dedicated driver app.
4. Modify the system properties
- Press Windows + E to open File Explorer.
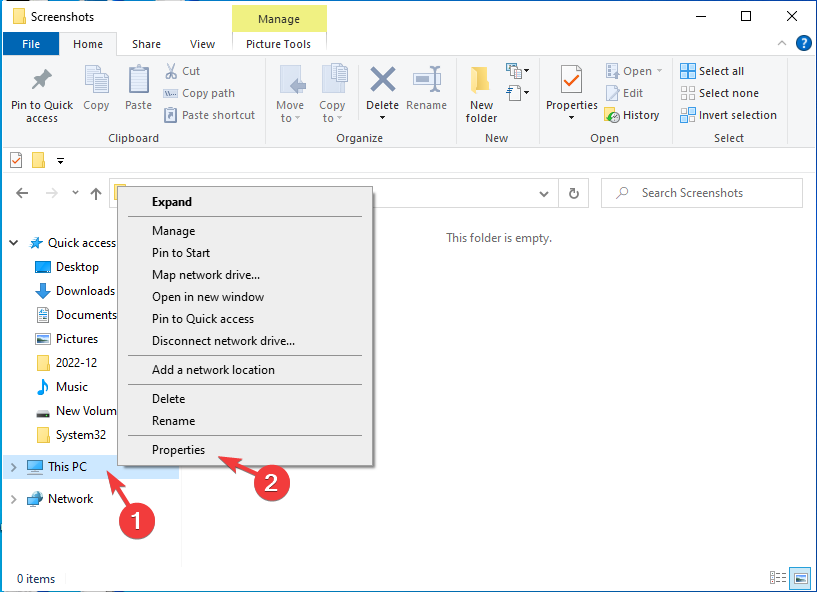
- Right-click This PC and select Properties.
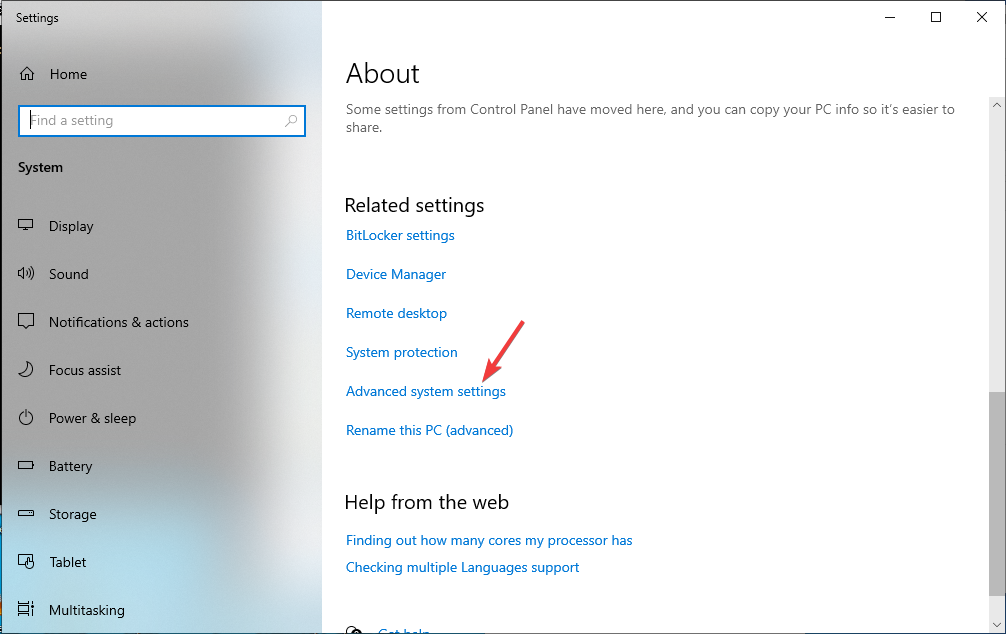
- Now click Advanced system settings.
- On the System Properties window, go to Advanced, and under Performance, click Settings.
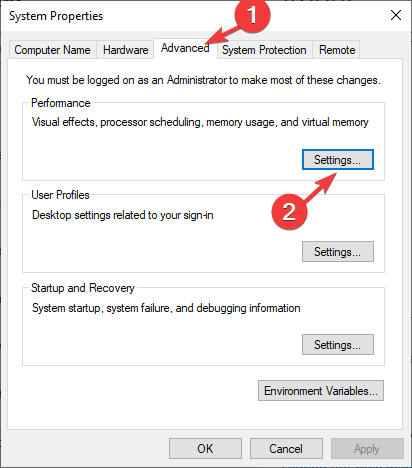
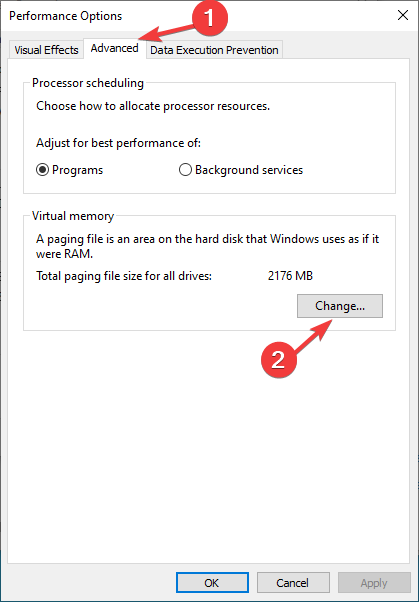
- Go to the Advanced tab, under Virtual memory, and click Change.
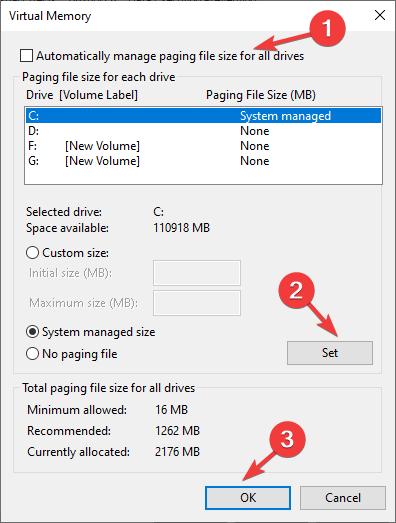
- Remove the checkmark next to Automatically manage paging files for all drives, click Set, then OK.
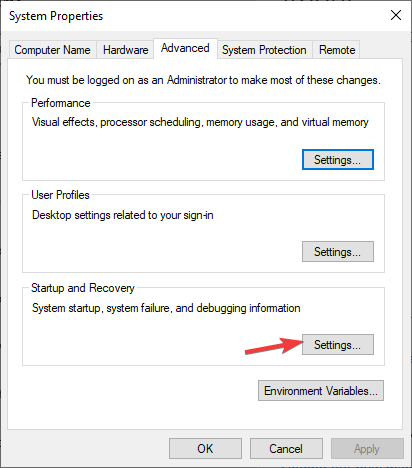
- Go back to the System Properties window, under Startup and Recovery, and click Settings.
- Remove the checkmark next to the Write an event to the system log, and Automatically restart options.
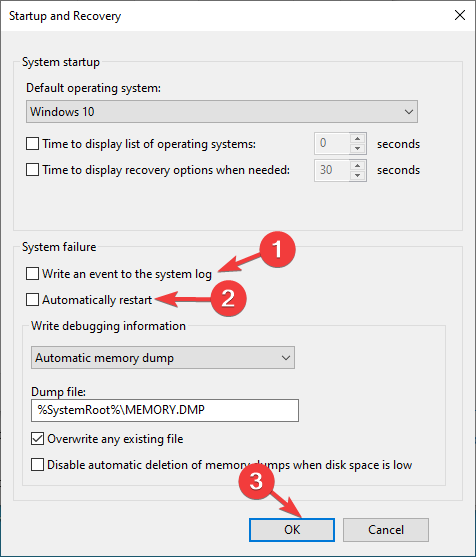
- Click OK, then OK on the prompt to confirm,
- Click Apply and OK to close the window. You will get the prompt to restart your computer to save the changes.
5. Test the RAM
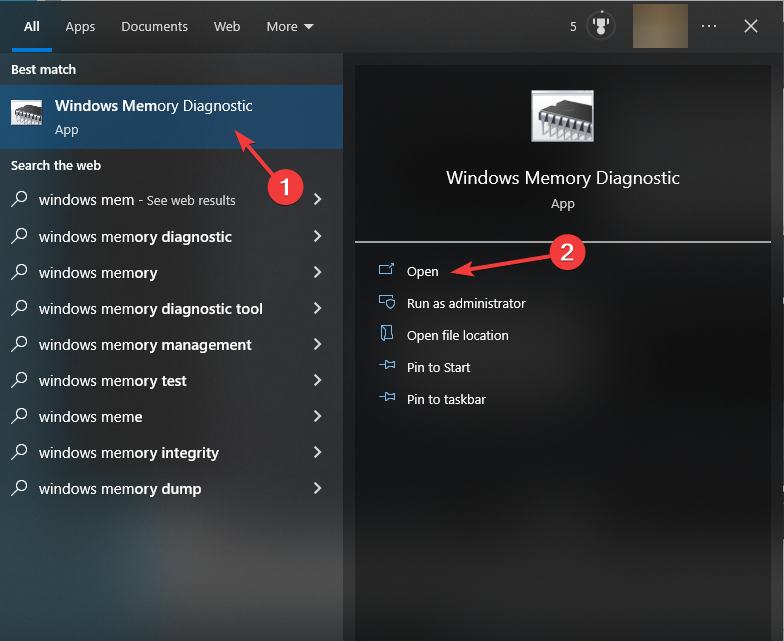
- Press the Windows key, type windows memory diagnostic, and click Open.
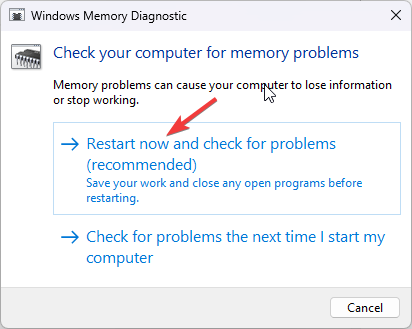
- Select Restart now and check for problems (recommended). Before choosing this option, ensure you have saved your work and closed all the other windows.
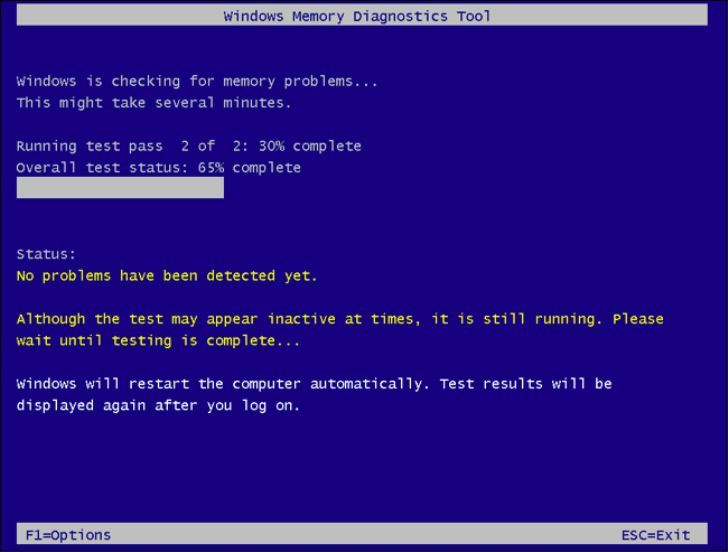
- Your computer will restart, and the scan will initiate. It might take up to 20 minutes. Once done, the PC will restart again, and you can see the results once you log in.
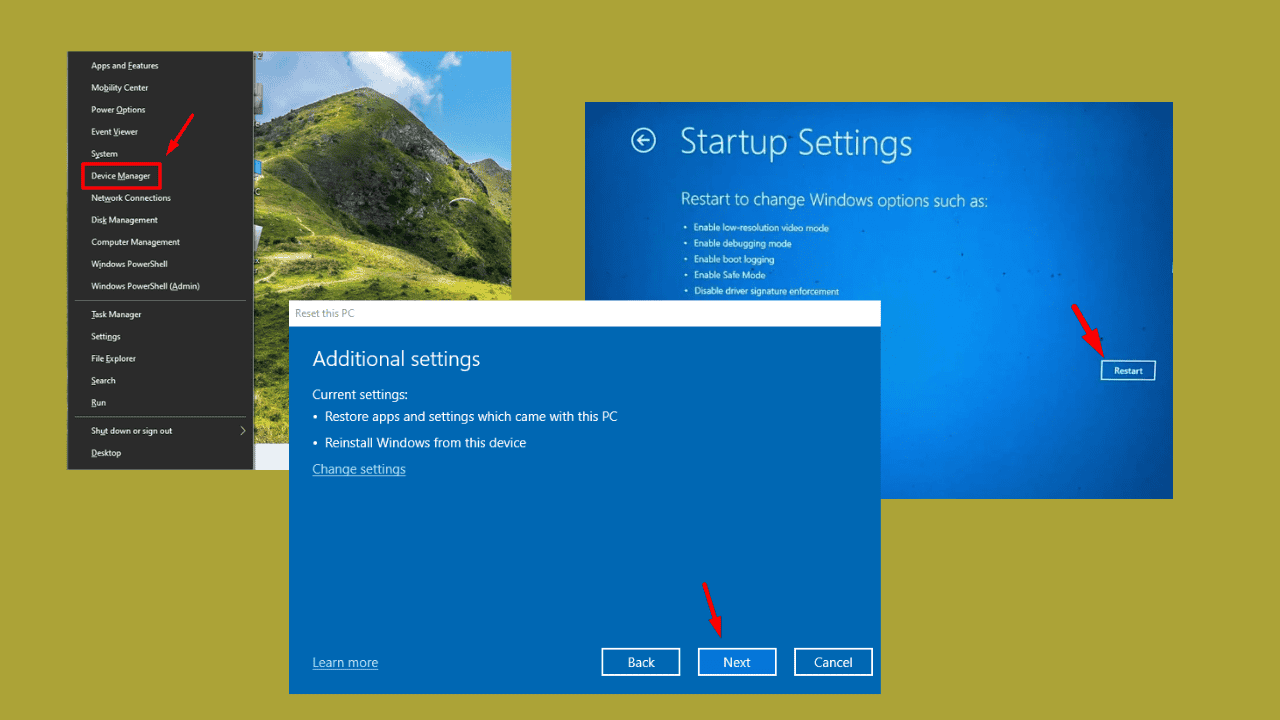
If there are no errors listed after the scan, but the error persists, then try to restore Windows to the previous version or reset your PC. However, there are errors; chances are your RAM is faulty. Try unseating and cleaning the memory and other slots. If other hardware problems are detected, we have an expert guide on how you can navigate this issue.
So, these are methods you can follow to fix the Page Fault in Nonpaged Area error on Windows 10. If nothing has worked for you, then you might have to replace the hard disk on your machine, as it could be the sole reason for the error.
Please feel free to give us any information, tips, and your experience with the subject in the comments section below.

User forum
0 messages